



Add a Voucher
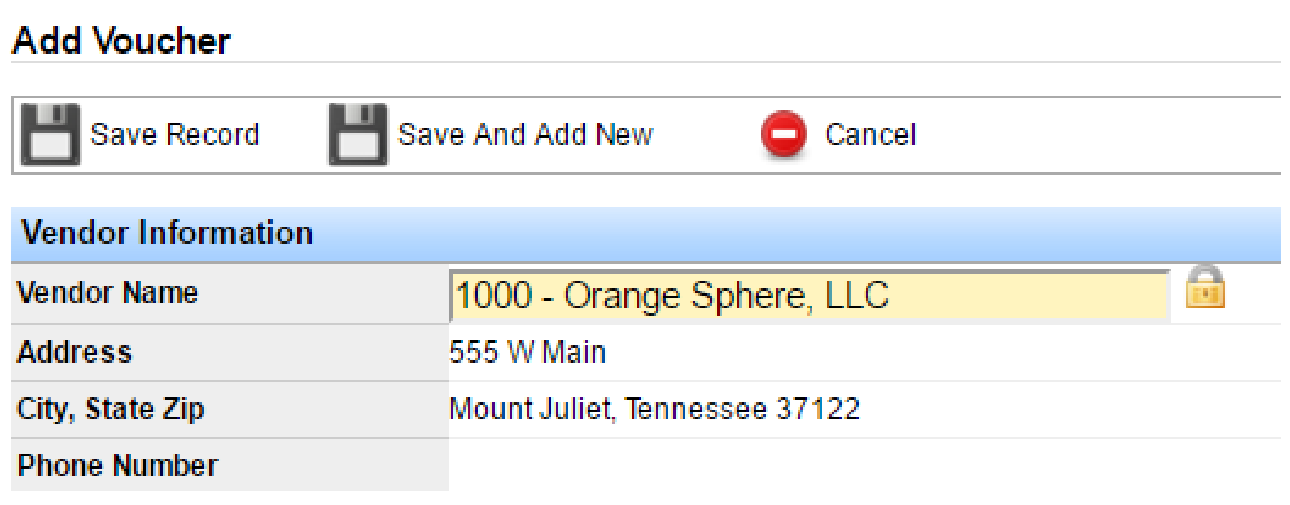
Vendors must already exist in the system before you can create vouchers. Go to Accounting > Accounts Payable > Vouchers > Add Voucher.
Note: For full vendor and voucher setup (posting, checks, ACH), see the AP Vendors & Vouchers guide.
In the Vendor Information section, enter the vendor name. As you type, vendors auto-populate—click to lock one in. Address, phone, credit status, and credit limit fill from the vendor profile when that data is on file.
Voucher Information
Complete the Voucher Information section on the bottom half of the screen.
- Category: Select the category for this voucher.
- Payment Method: Select the checking account you will pay from. Checking accounts must already be set up under Accounting > Checking Accounts > Checking Accounts > Add Checking Account (you can open Transport Pro in another tab if you need to add one mid-entry). See Add & Edit Checking Accounts.
- Invoice Date / Invoice Number: Enter the vendor invoice date and number.
- PO Number: Optional, if applicable.
- Due Date / GL Distribution Date: Enter both dates.
- Approved By: Name or initials. Not required to save, but required to approve/post the voucher.
- Description: Required.
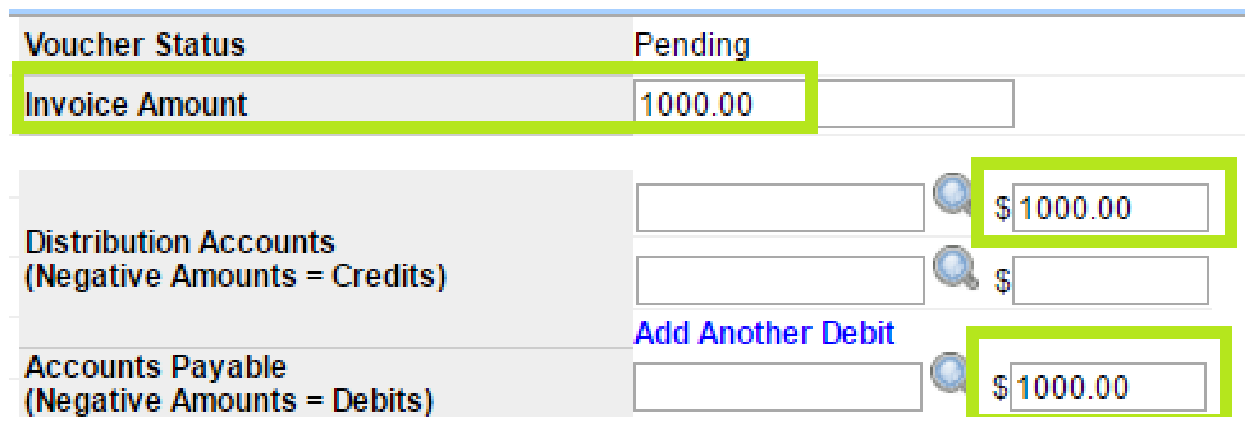
Voucher Status shows Pending until you post. Enter the Invoice Amount—the system auto-fills the distribution and accounts payable amount fields with that total.
Split Distribution Accounts
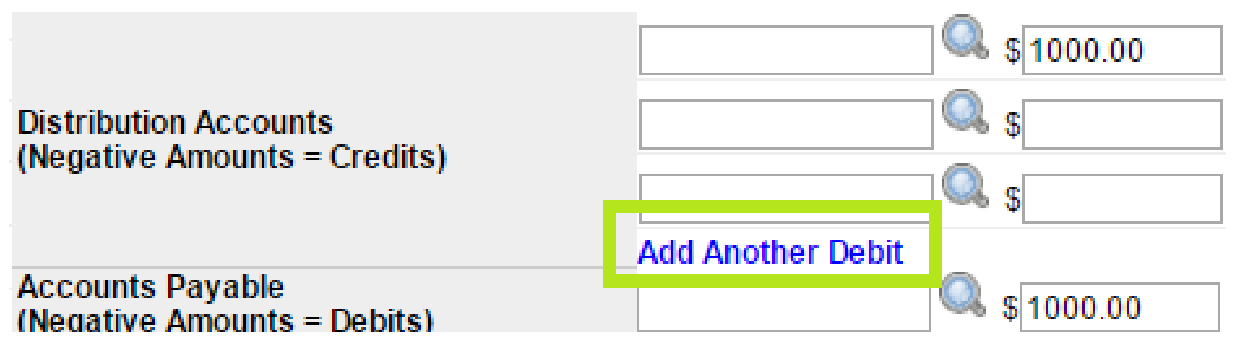
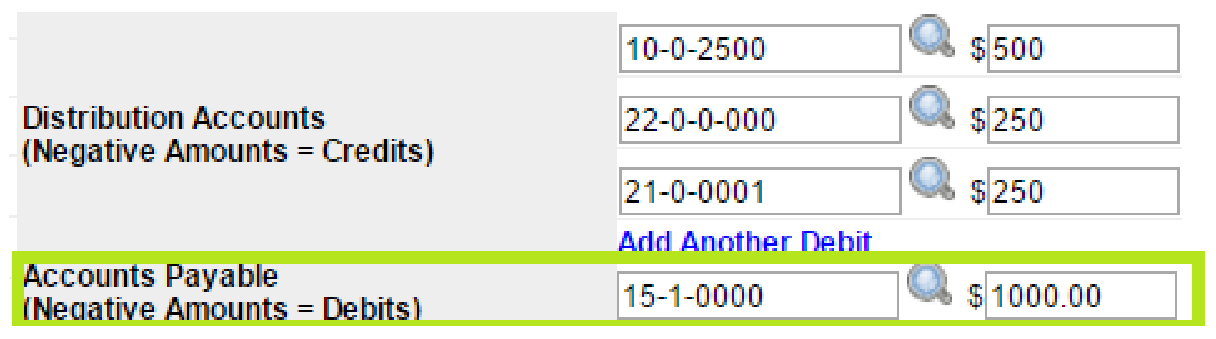
When the payout must hit more than one GL account, split the invoice across multiple distribution (debit) lines. The form starts with two distribution lines. If you need more—for example, three amounts on three accounts—click Add Another Debit.
Note: There is no limit on how many debit lines you can add.
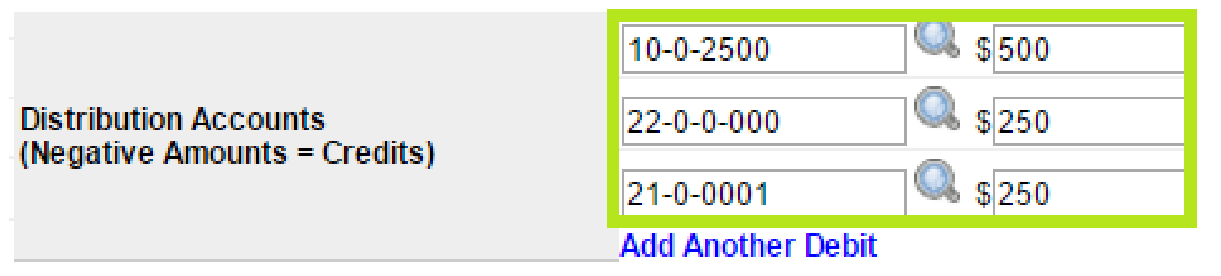
Enter each distribution account and amount so the lines add up to the invoice total (for example, $500 + $250 + $250 = $1,000).
Then enter the Accounts Payable account. The AP amount should match the full invoice amount (for example, $1,000.00).
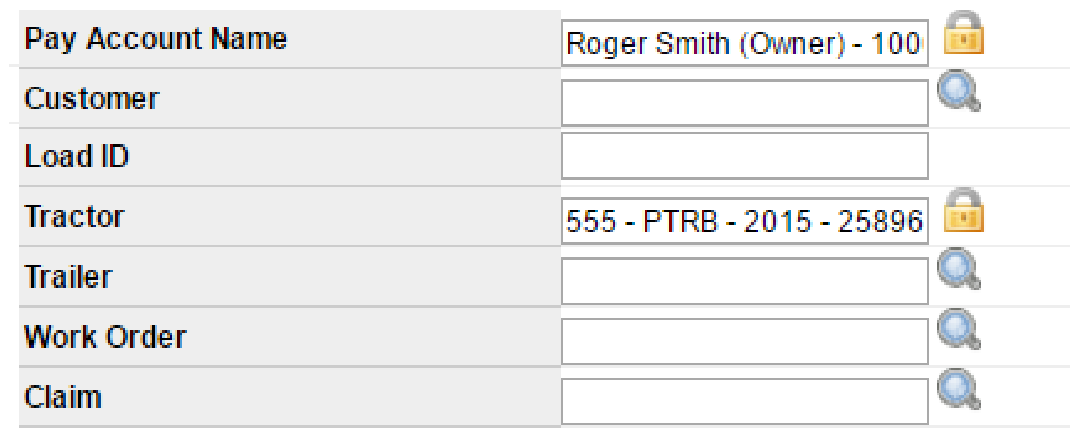
In the third column, optionally tag related records (pay account name, customer, load ID, tractor, trailer, work order, claim, and so on). These are not required, but recommended for organization.
Save and Post
When required fields are complete, click Save.
Note: After you save, post the voucher so it can move into payment. Full posting, open voucher queue, check printing, and ACH steps are covered in the AP Vendors & Vouchers guide.
If you have questions about partial voucher payments, contact support at support@transportpro.net.