


Create a Master Bill
To create a master bill for a customer, open that customer's summary screen and scroll about halfway down the page to the Master Billing section.

Click +Add Master Bill. You are redirected to the Manage Master Bill screen, where you search for the invoices you want to include.
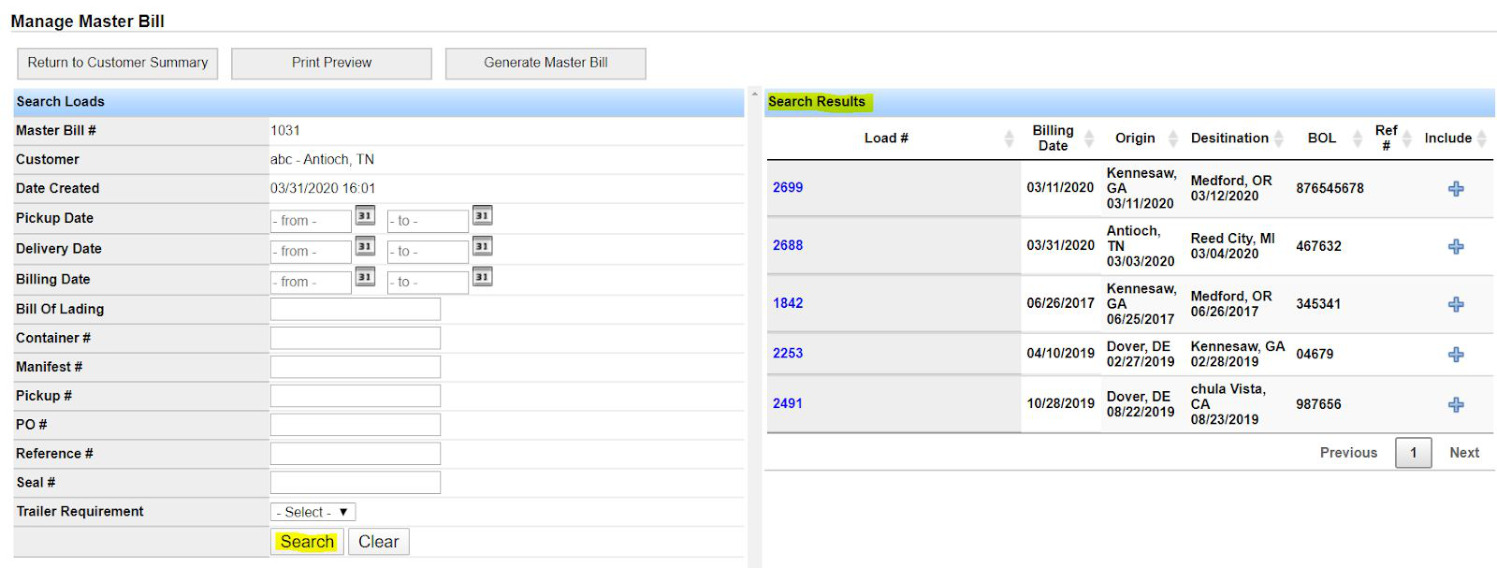
Use the available filters to narrow the list, or simply click Search to generate a list of all invoices for that customer. Matching invoices appear in the Search Results section below.
Select Invoices to Include
Click the + icon to the right of each invoice you want to include on the master bill. As you add invoices, the list of selected loads populates at the bottom of the page.
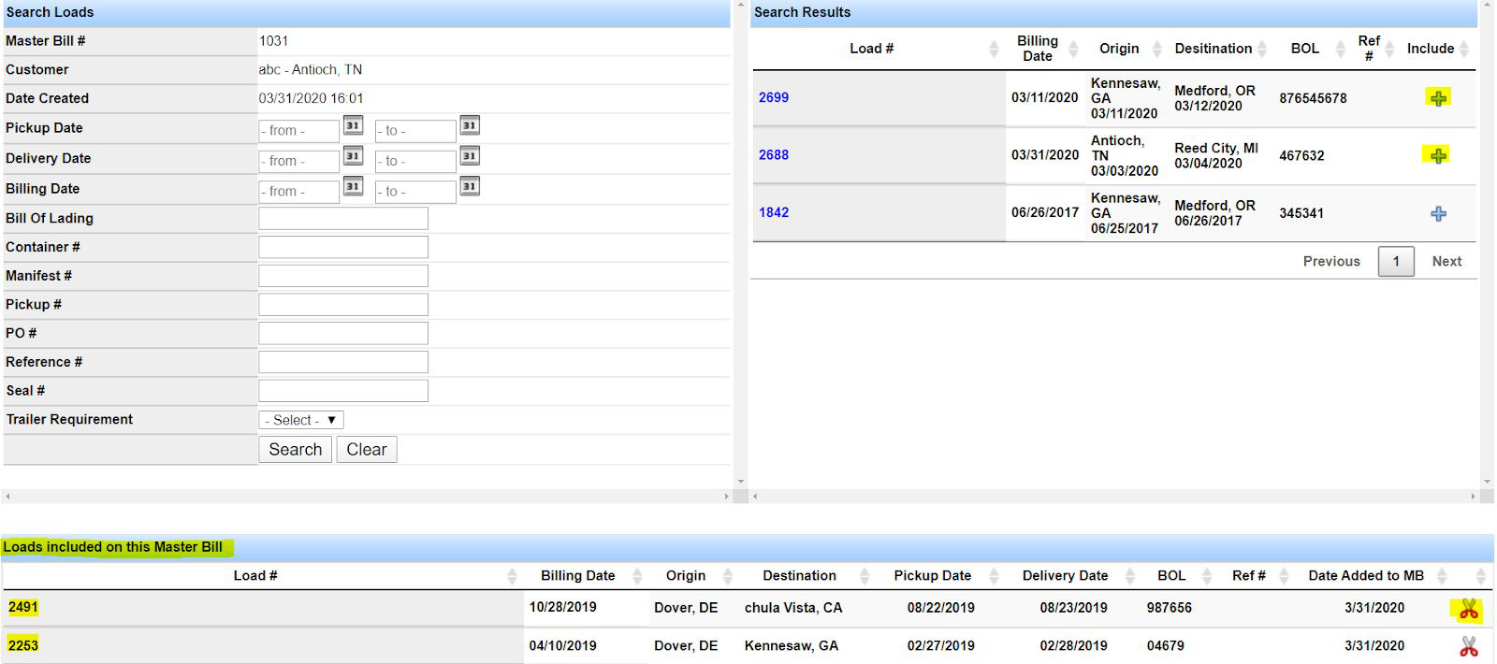
Note: If you accidentally add an invoice you don't want to include, click the scissor icon next to it to remove it from the selected loads list.
Preview and Generate the Master Bill
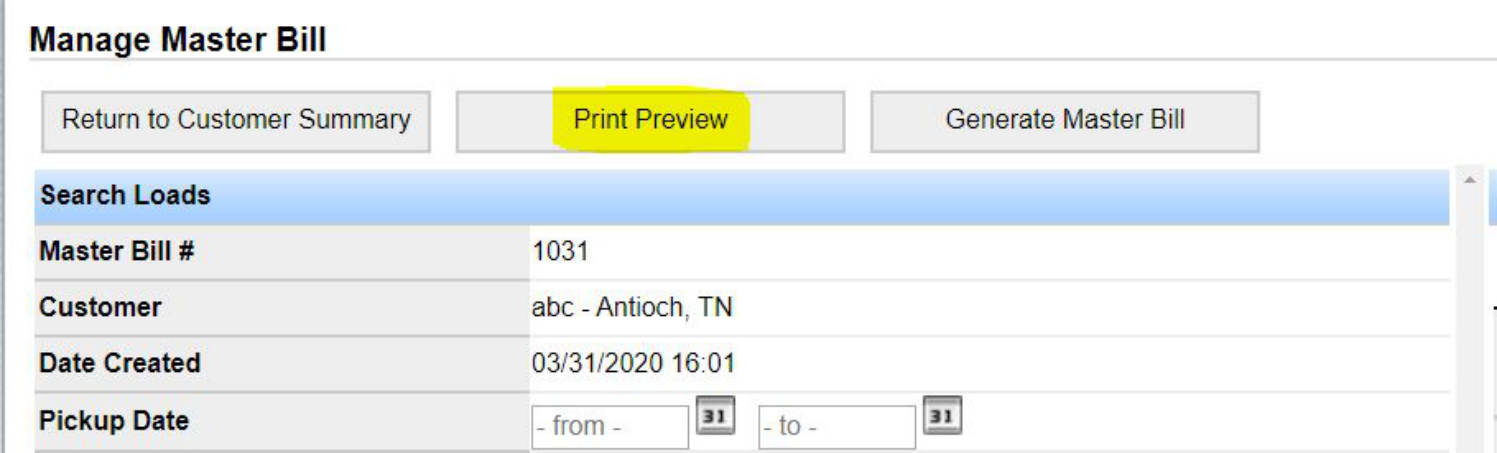
Once you have selected all of the invoices you want on the master bill, you can preview a draft before generating it. Click the Print Preview tab at the top of the screen.
A new browser tab opens with a preview of the master bill. Review it for accuracy.
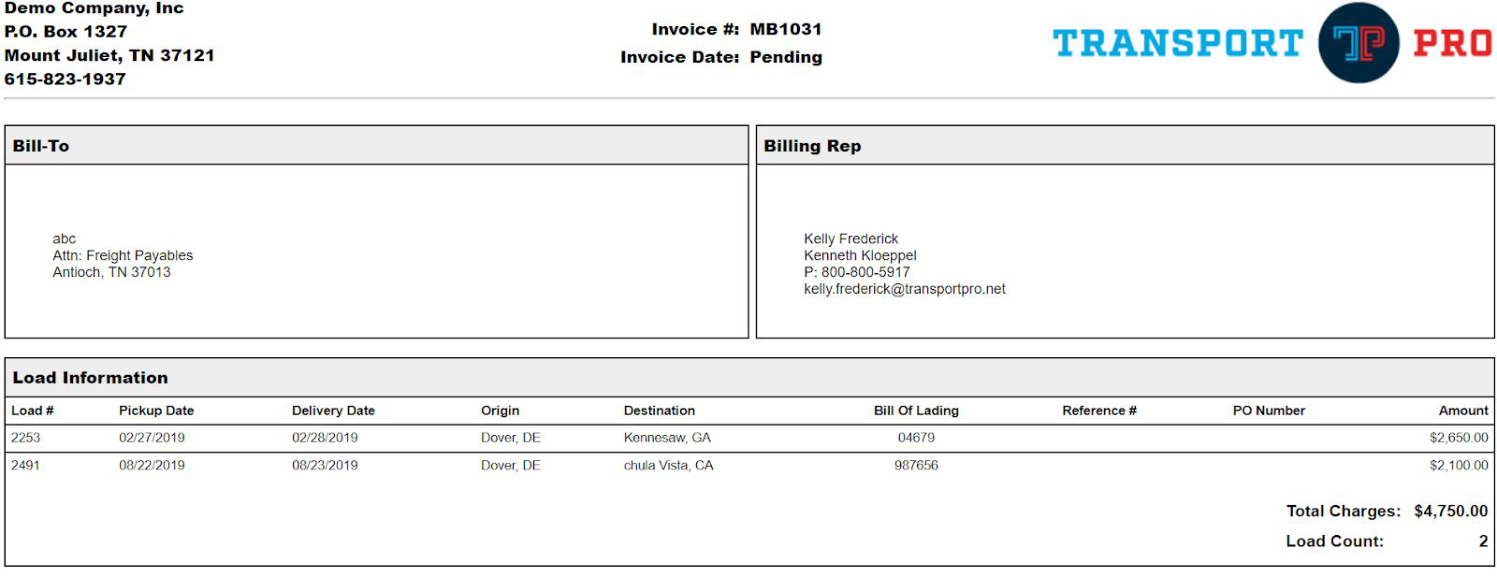
From here, go back and make edits if needed, or, if everything looks correct, return to the Manage Master Bill screen and click the Generate Master Bill tab.
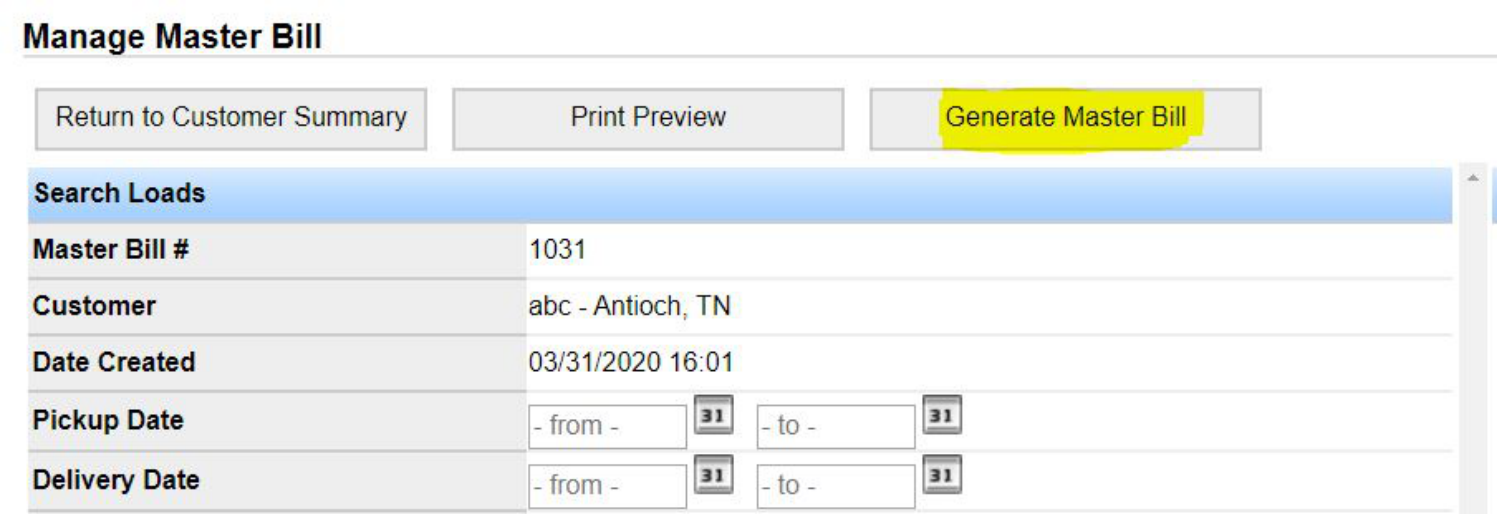
A pop-up message asks you to confirm that you want to create the master bill—click OK. The master bill generates and the system redirects you back to the customer summary screen.
Note: You'll also notice a Return to Customer Summary tab. If you click this instead of generating, you are redirected back to customer summary and the system saves your work as a master bill draft you can finish later.
The Master Billing Packet
After you generate the master bill, it appears in the Master Billing section of the customer summary screen where you started. You can view the date created, number of loads on the master bill, total amount, and date billed.

Generating the master bill also creates a master billing packet, which the system places in the File History section of the customer summary screen.

Note: The first page of the packet is the master bill itself. It lists, for each load referenced: load #, pickup and delivery dates, origin and destination, bill of lading, reference #, PO #, and amount—plus a total amount and load count at the bottom. The invoice date shown is the date you created the master bill. The rest of the packet includes all of the required supporting documentation indexed against each referenced load.
Use the management tools to the right of the packet in File History to preview, download, or email it out of the system. See the Generate a Billing Statement guide for more on sending billing documents by email or pushing to imaging.
Edit a Draft or Re-Bill a Master Bill
Whether you started a master bill and never finished it, or generated one and later need to make changes, you can pick back up easily from the Master Billing section of the customer summary screen.
You can tell a draft apart from a master bill you've already generated by the management tools shown next to it. A draft shows tools to preview, edit, generate, or delete it.

If you forgot to generate a ready draft, click Generate Master Bill directly from this section.

A master bill that has already been generated shows a lock icon instead of the draft management tools.

To re-bill, click the lock icon.

You are redirected to the master billing management screen, where you can make the desired edits and generate a new master bill.
Questions about master billing? Contact support@transportpro.net.