



Add a User & Profile Fields
Go to Administration > Manage System Users > Add System User. Complete the top half of the form. Yellow fields are required.
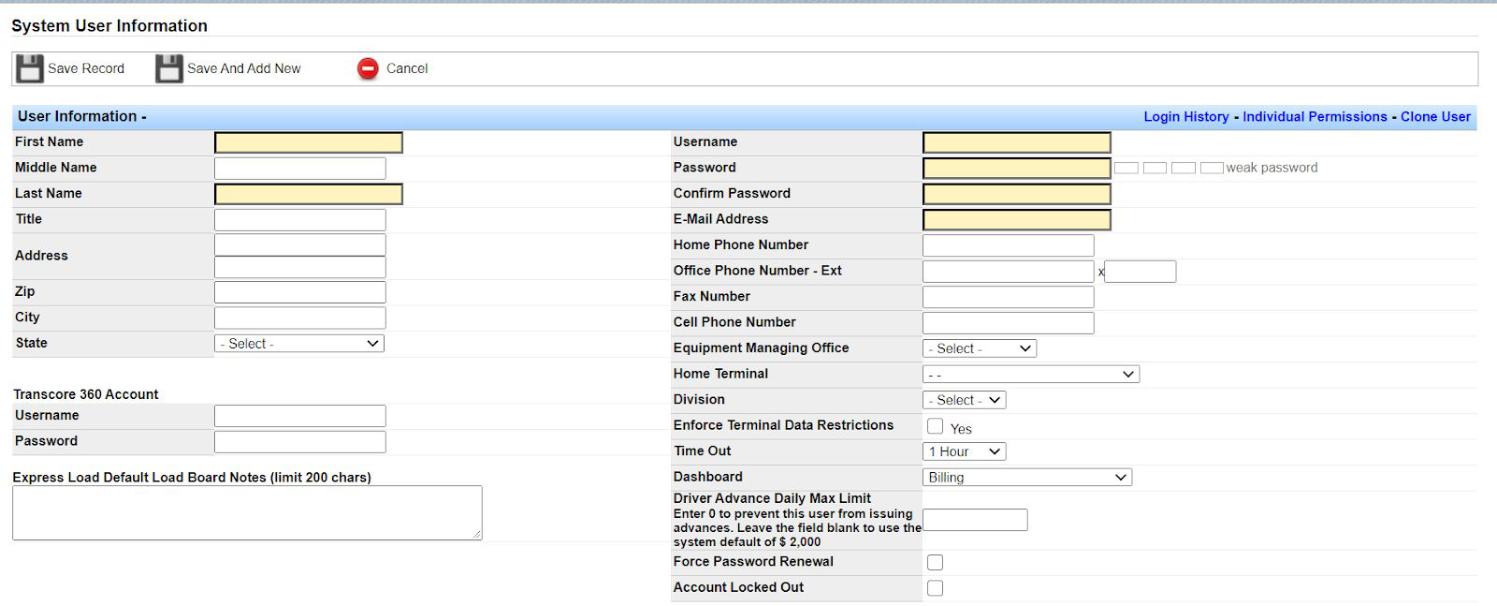
Explanation of Fields
- First / Middle / Last Name: User’s name.
- Title: Job title.
- Address / Zip / City / State: Residence address.
- Transcore 360 username and password: Only for brokerage users who post loads from Transport Pro to DAT. Leave blank if you do not have a DAT integration for this user.
- Username: Login username (case-sensitive). Email is a common choice because it is unique.
- Password / Confirm Password: Login password (case-sensitive).
- Email Address: User’s email.
- Home / Office / Fax / Cell Phone: Contact numbers. If Office Phone is filled, that number appears on dispatch and rate confirmations this user sends; otherwise the terminal phone is used.
- Equipment Managing Office: Optional informational tag. Manage dropdown values under Administration > Manage Site Settings > Manage Dropdown Values (Equipment Locations table).
- Home Terminal: Optional. A terminal is an outside 1099 office/agent. See Add & Manage Terminals.
- Division: Optional informational tag. Support must add division options—email support@transportpro.net.
- Enforce Terminal Data Restrictions: Limits the user to data tied to their home terminal (for example, an agent who should only see that office’s loads and drivers).
- Time Out: Defaults to 1 Hour of inactivity. Ask support to add other timeout options if needed.
- Dashboard: Screen shown after login (for example, Freight Operations for dispatch).
- Driver Advance Daily Max Limit: Only if you use Comdata or EFS real-time integration for advances at dispatch. Sets this user’s daily advance limit.
- Force Password Renewal: Prompts the user to set a new password at next login. Useful after an admin reset.
- Account Locked Out: Locks the user out (for example, when someone leaves). Frees a license while keeping history.
Set Permissions
The bottom half of the user screen is where you assign permissions.
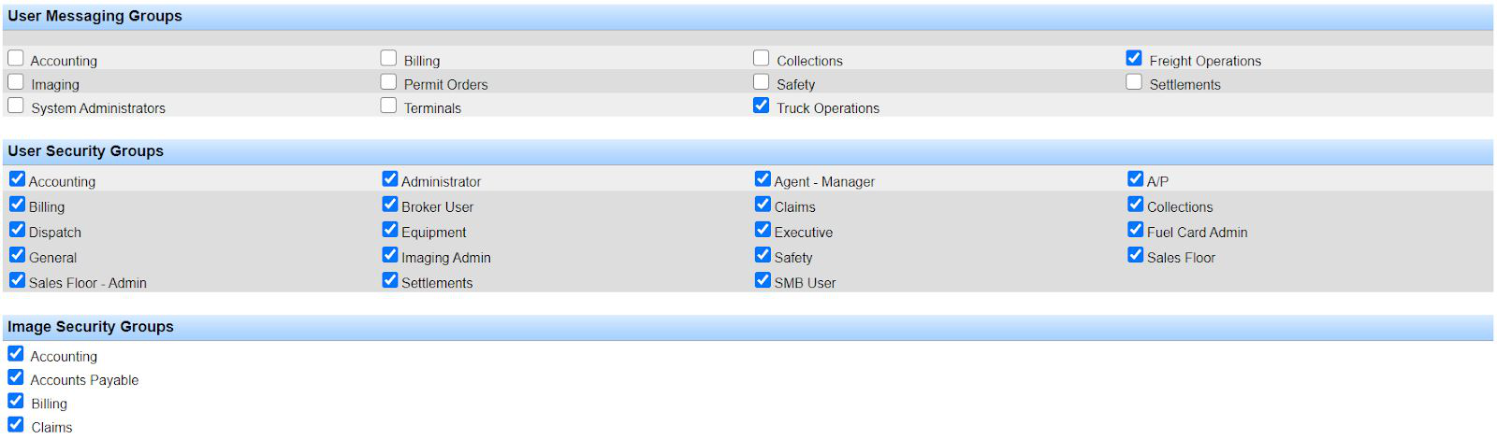
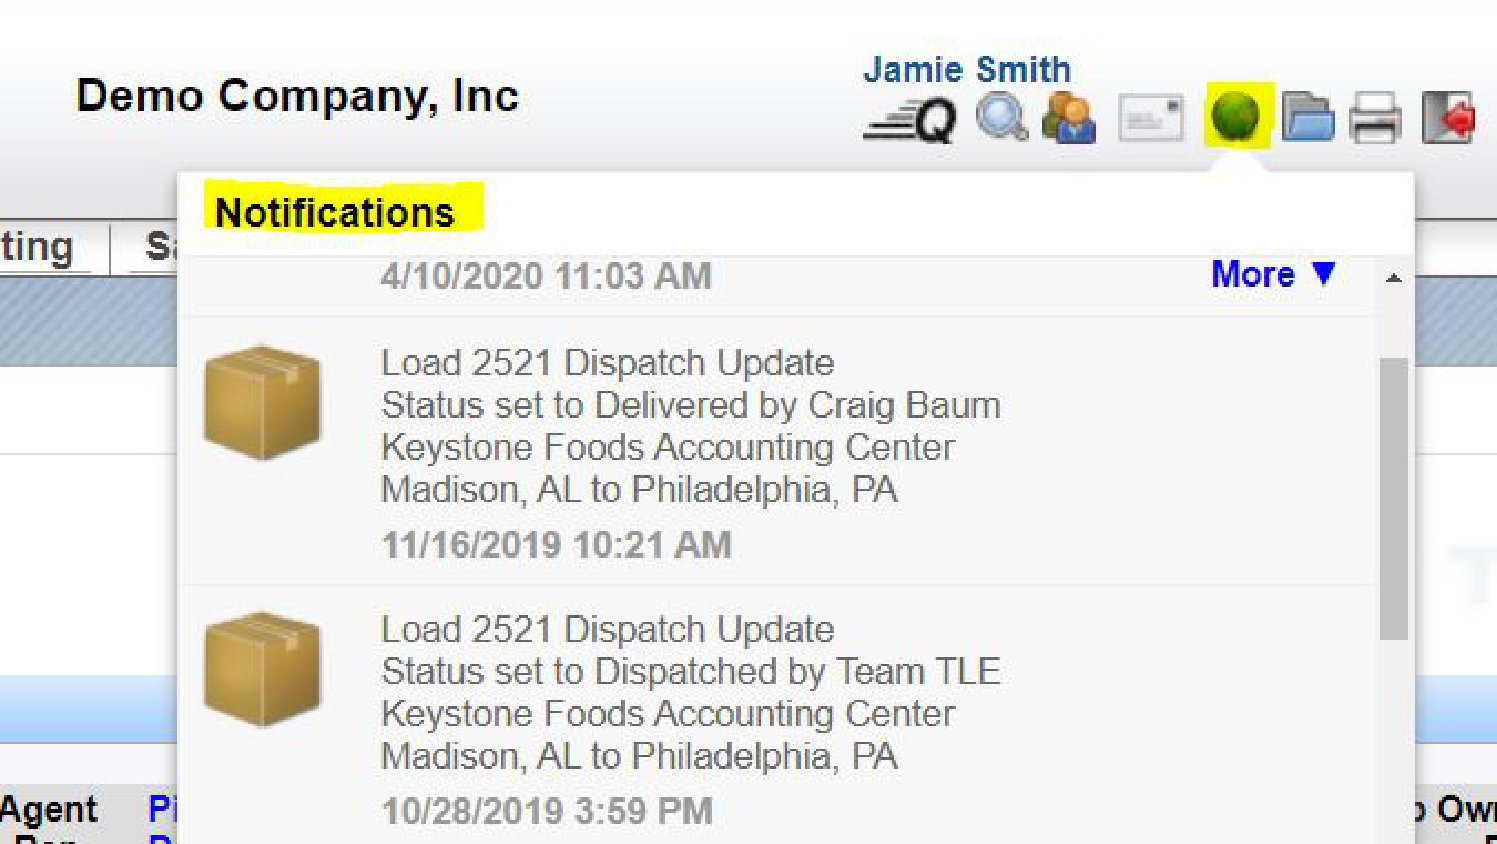
User Messaging Groups control which internal system notifications the user receives (accessed via the earth icon above the main menu). For example, Freight Operations messaging notifies on load status updates.
User Security Groups map to the main tabs across the top of Transport Pro. Checking Billing, for example, grants access to the full Billing menu.

Note: Support can set individual permissions on request (for example, one settlements report without the full Settlements menu). Open a ticket at support@transportpro.net.
Important: Login - Required must be checked for every active user.
User Security Groups
What each group typically unlocks:
- Accounting: Full Accounting menu—reports (balance sheet, P&L), GL search/adjustments, checking accounts, cash reconciliation, AP vendors/vouchers, chart of accounts, fixed assets.
- Collections: Full A/R (cash receipts, aging and related reports) and full Customers menu.
- Fuel Card Maint: Fuel Card Maintenance under Settlements—cards, transactions report, fuel tickets.
- Sales CRM: Leads & Accounts, activity report, and sales agent dashboard. Sales users must also be set up under the Sales tab separately.
- Administrator: Full Administration—users, terminals, site settings (billing/settlement codes, quick pay, adjustment codes, commodities, dropdowns).
- Customer Management: Full Customers menu and locations.
- Imaging Admin: Full Imaging—upload, index, search, manage document types and image security groups.
- Sales CRM - Admin: Full Sales menu including floors/teams/permissions, leads, reports, and dispositions (typical for sales managers).
- Billing: Load Management billing actions, Customers, and full Billing menu (dashboard, queues, misc invoices, FSC, reports).
- Dispatch: Full Load Management (dashboards, add/edit/dispatch, search, Exchange), plus selected Drivers/Equip and Customers search access.
- Login - Required: Ability to log in. Required for all active users.
- Settlements: Full Settlements menu (dashboard, process, print queue, recurring, reports, fuel cards, ACH, vendors, messages) plus selected Accounting check tools (search checks, manual void, unvalidated checks).
- Broker Carrier Management: Full Broker Carriers—carriers, factoring companies, onboarding (DAT CarrierWatch or SaferWatch), qualifications, monitoring.
- Executive: Full Reports menu—operational and sales/executive reports.
- Safety: Full Drivers/Equip plus equipment maintenance (PM, warranties, work orders, VMRS, dashboards/reports).
Image & GL Security Groups
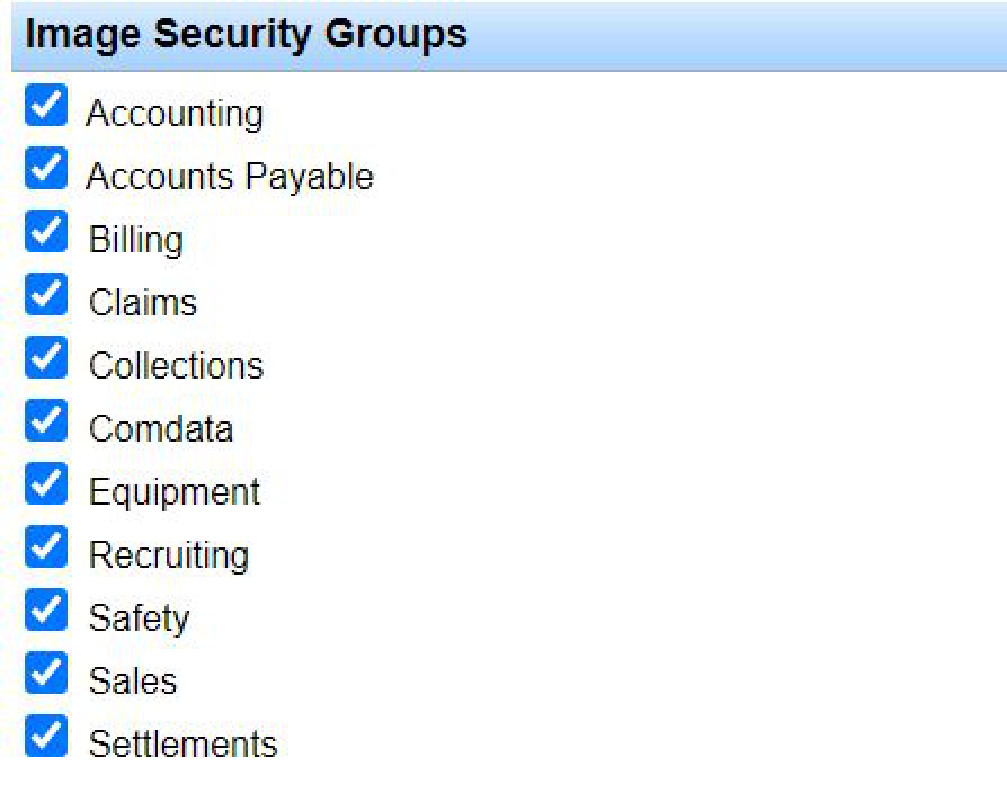
Image Security Groups control who can manage locked-down document types. Users can upload documents to profiles they can access and manage files they uploaded. If a document type (for example, CDL) is locked to the Safety image group and a user lacks that group, they may see the indexed document but cannot manage it (it appears grayed out).
Manage document type security under Imaging > Manage Document Type. Smaller teams often check all image groups; larger teams may lock types more tightly.
GL Security Groups apply to the general ledger. Typically only accounting, billing, or settlements users need them:
- All Accounts: Assign GL on billing and settlement codes; search/view chart of accounts.
- Billing Accounts: Assign GL on billing codes; search/view chart of accounts.
- DRS Accounts: Set GL on settlement codes; view chart of accounts.
Search System Users
Go to Administration > Manage System Users > Search System Users. Use filters or click Search with no filters to list all users. Open a profile via the ID or the edit icon.
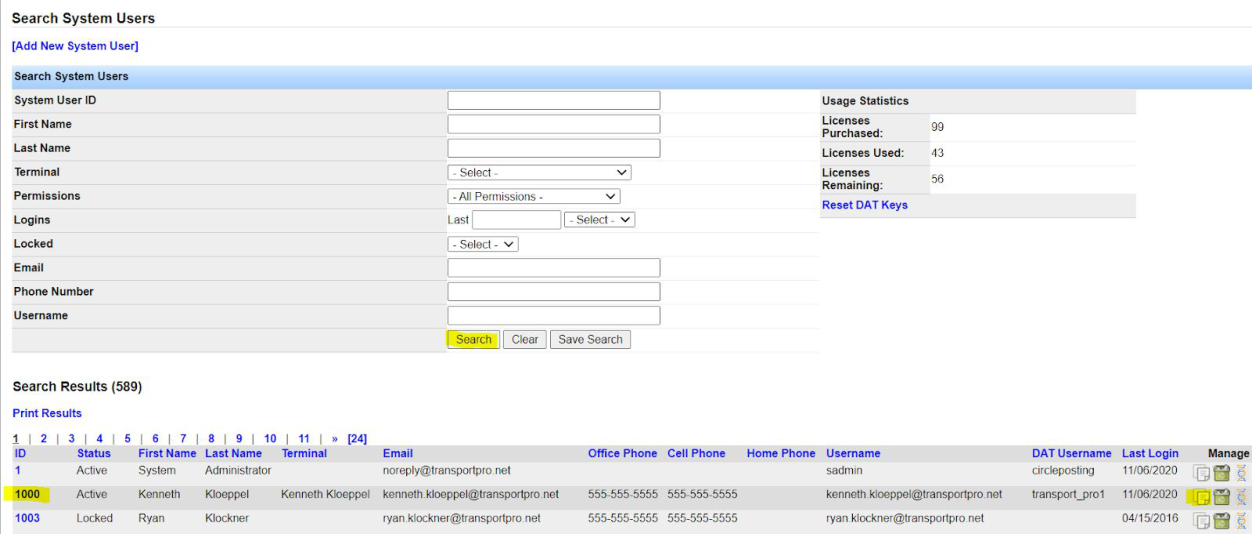
Note: The search screen shows licenses purchased, used, and remaining. To add licenses, contact support@transportpro.net.
User Activity Reports
Administrators can review login history, change logs, and special permissions.
For login history across users, go to Administration > Manage System Users > User Activity, apply filters, and click Get Report. Results include username, login date, and whether access was granted or denied.
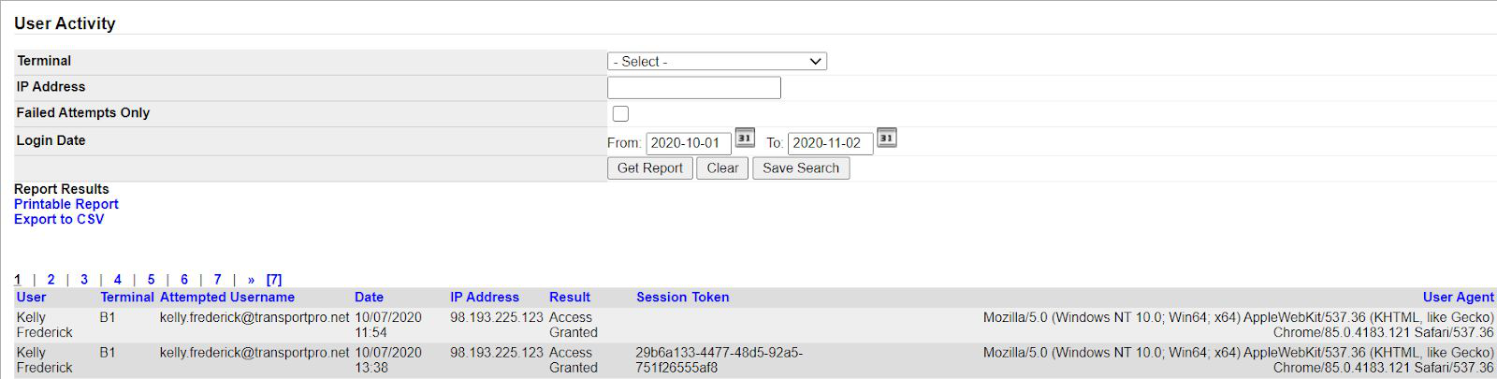
From a user’s profile, click Login History (upper right) for date, IP address, and login/logout or failed attempt details.

If support set individual permissions, open them from Individual Permissions on the profile. Use Change Log (upper left) to see who last changed the profile and when.


Copy User Profiles / Permissions
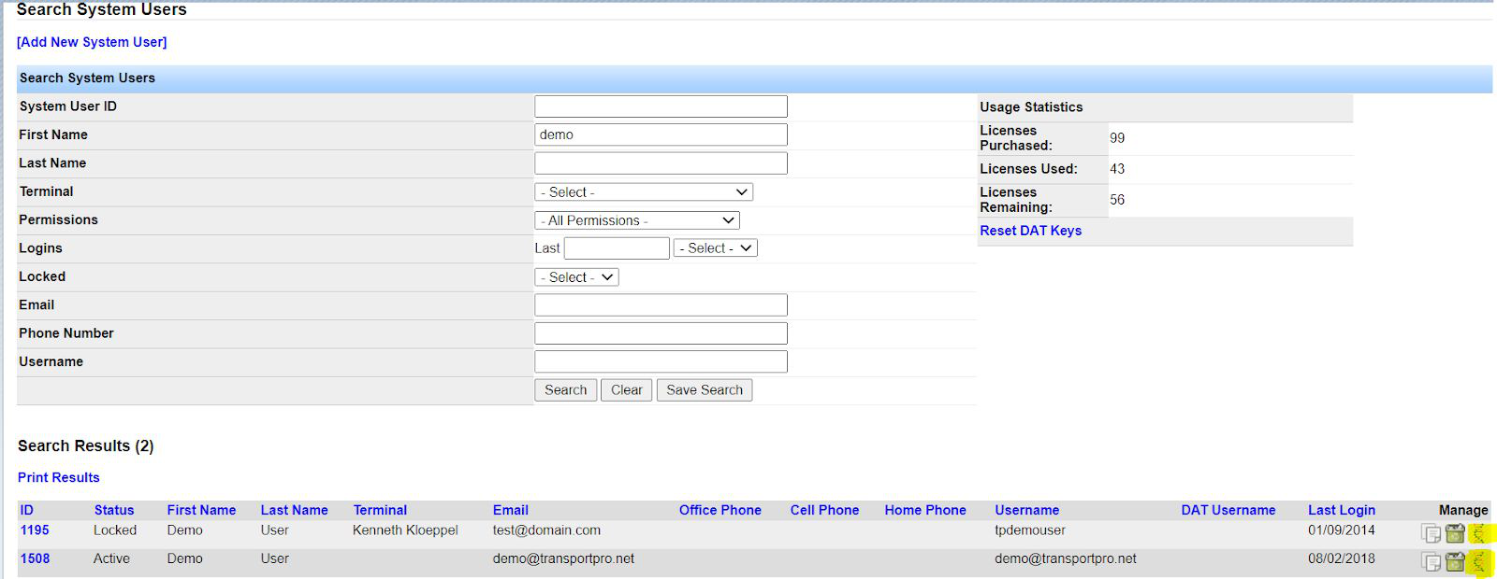
Clone permissions from an existing user when adding someone in the same role (for example, a second safety user).
From Search System Users, open the profile to copy and click the clone icon, or click Clone User on the profile. Finish the new user’s contact information; permissions carry over.

Questions about users or permissions: support@transportpro.net.