



Set Up & Manage Look Up Tables:
Enterprise
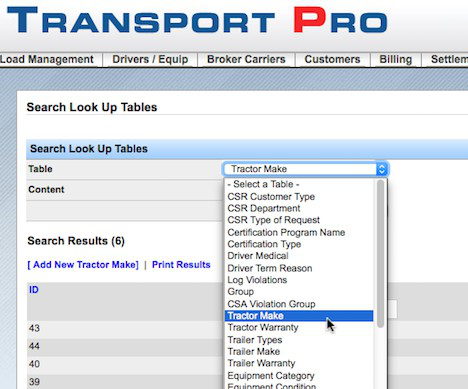
Table of Contents
Set Up and Manage Look Up Tables......................................................................................................... 3
Set Up and Manage Look Up Tables
Entering items into the Look Up Tables in Transport Pro is necessary in order for the system to retain this information and make it available in the drop-down menus throughout the system.
You can enter various items such as driver medical information, log violation types, and warranties.
Please note that you must at least enter your Tractor Makes, Trailer Makes, and Trailer Types into the system.
These three items are required.
- Follow the path in the menu Administration > Manage Lookup Tables.
Section 4
- A window will open that allows you to search for specific lookup tables.
Use the table drop-down menu to choose the appropriate option.
Then click “search.”
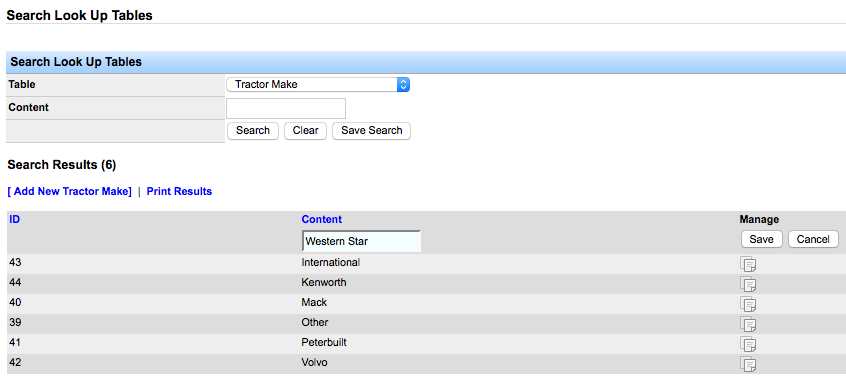
- The picture below shows what the window looks like when the Tractor Make category is selected.
After you select the correct option, a list of saved items will appear.
If you need to add additional items, click the “add new” option located in the upper left-hand corner above the list of saved items.
- If you choose to add an additional item, a box under the content column appears and allows you to make an additional entry.
Repeat this process to add as many items as necessary.
Be sure to click “save” after adding each item.