Create Import File
Most banks and credit card companies have a download utility that allows you to download a CSV copy of your transactions.
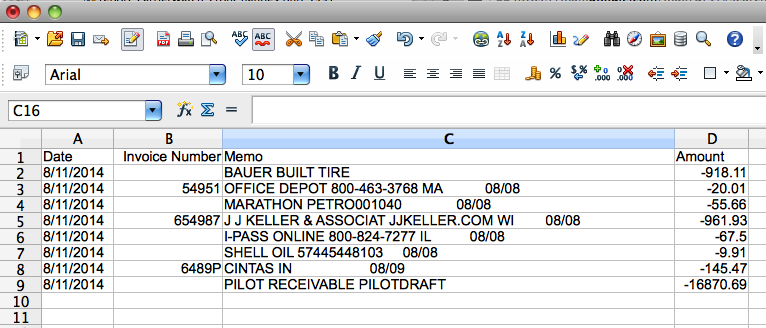
Download your transactions and open the file in Microsoft Excel, Open Office Calc, or other spreadsheet program.
Transport Pro requires four columns
- in the following order: Date, Invoice Number, Memo, and Amount.
The headers shown in the screen shot on the following page should be included in your final file.
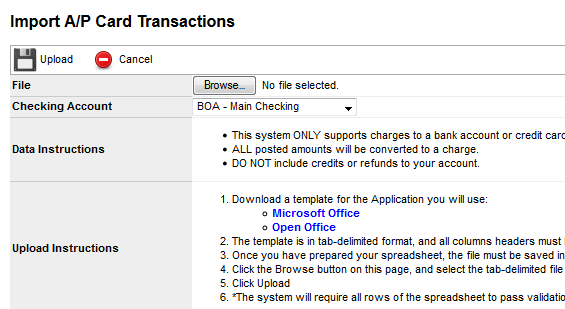
A template of the import file may be downloaded from the Import Card Transactions page.
Note: Some banks will show charges as negative amounts, where as credit card companies
may show charge amounts as positive numbers.
Transport Pro automatically adjusts all transactions to charge amounts.
DO not include credit transactions in your uploaded file as they will be treated as a charge to your bank account.
When saving your file, be sure to save the file as a TAB-DELIMITED file.
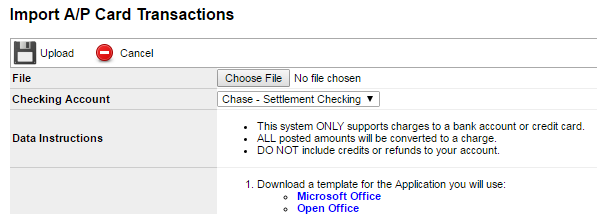
Sample spreadsheet Importing Transactions Once you have your file ready, navigate to the Import Card Transactions page and browse for your transaction file on your local computer.
Select the file, and then select which bank account the transactions apply to.
Click the Upload Button.
The system will display a success message, or alert you to any problems with the file once it has processed.
Importing Transactions
Create Import File Most banks and credit card companies have a download utility that allows you to download a CSV copy of your transactions.
Download your transactions and open the file in Microsoft Excel, Open Office Calc, or other spreadsheet program.
Transport Pro requires four columns
- in the following order: Date, Invoice Number, Memo, and Amount.
The headers shown in the screen shot on the following page should be included in your final file.
A template of the import file may be downloaded from the Import Card Transactions page.
Note: Some banks will show charges as negative amounts, where as credit card companies
may show charge amounts as positive numbers.
Transport Pro automatically adjusts all transactions to charge amounts.
DO not include credit transactions in your uploaded file as they will be treated as a charge to your bank account.
When saving your file, be sure to save the file as a TAB-DELIMITED file.
Sample spreadsheet Importing Transactions Once you have your file ready, navigate to the Import Card Transactions page and browse for your transaction file on your local computer.
Select the file, and then select which bank account the transactions apply to.
Click the Upload Button.
The system will display a success message, or alert you to any problems with the file once it has processed.
Processing Transactions
Once you have successfully uploaded the transaction file, the system places those transactions into a processing queue.
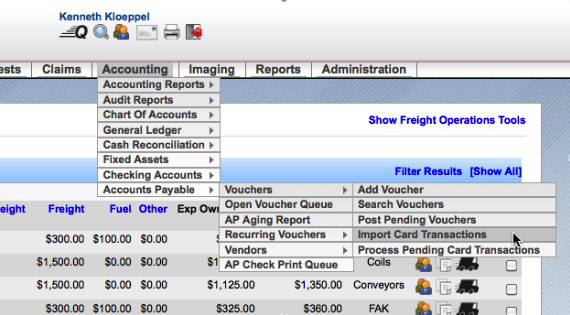
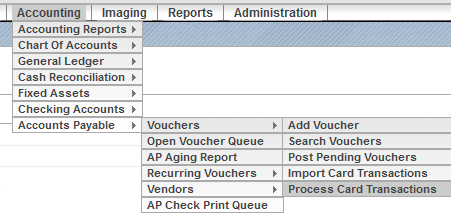
To process the transactions, go to the Process Pending Card Transactions screen by following the path in the menu Accounting > Accounts Payable > Vouchers > Process Card Transactions.
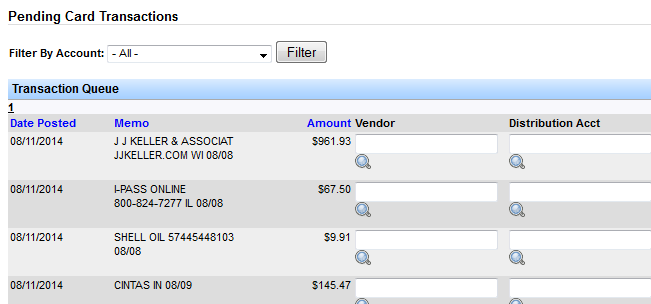
Here you will find a list of all the transactions you have uploaded to the system.
At this point, no vouchers, checks, or GL transactions have occurred.
Vendor Assignment
When the transactions are uploaded, Transport Pro will attempt to pre-assign the correct vendor to each transaction.
The assignment is based solely on the Memo field provided in the uploaded file.
The system compares the value of the memo against the names of the vendors in your Transport Pro installation.
If there is a match, the vendor will be automatically assigned to the transaction.
Often times, the Memo field contains long values that include account numbers, dates and possibly transaction numbers.
This will not match a vendor in your system.
The first time you assign a transaction to a vendor, the value is stored in the Transport Pro system.
The next time you upload a transaction file, Transport Pro will look for previously assigned vendors with close matches to these long Memo fields.
If there is a match, the upload tool will automatically assign the last vendor used for that type of transaction.
If the system assigns a vendor to a specific transaction, but you want to assign the transaction to a different vendor, simply click the Lock icon under the Vendor field, and reassign the vendor by typing the name of the vendor, and clicking the appropriate value in the auto-suggest box.
This action will reassign the Distribution Account and Accounts Payable account for the transaction.
Finalize Transaction To finalize the processing of a transaction, the Vendor, Distribution Account, Accounts Payable, and Checking Account fields must be filled out before clicking the Add button.
When you click the Add button, the following actions will occur:
- A/P Voucher is created
- A/P Voucher is posted
- A/P Manual check is created paying the account
- Cash Reconciliation charge entry is created against the selected checking account
- All GL transactions for each of these steps are applied appropriately
If you find a duplicate transaction in your list, or other transaction you do not want to process through this utility, simply click the Delete button on the row for the transaction.
Finalize Transaction
Vendor Assignment When the transactions are uploaded, Transport Pro will attempt to pre-assign the correct vendor to each transaction.
The assignment is based solely on the Memo field provided in the uploaded file.
The system compares the value of the memo against the names of the vendors in your Transport Pro installation.
If there is a match, the vendor will be automatically assigned to the transaction.
Often times, the Memo field contains long values that include account numbers, dates and possibly transaction numbers.
This will not match a vendor in your system.
The first time you assign a transaction to a vendor, the value is stored in the Transport Pro system.
The next time you upload a transaction file, Transport Pro will look for previously assigned vendors with close matches to these long Memo fields.
If there is a match, the upload tool will automatically assign the last vendor used for that type of transaction.
If the system assigns a vendor to a specific transaction, but you want to assign the transaction to a different vendor, simply click the Lock icon under the Vendor field, and reassign the vendor by typing the name of the vendor, and clicking the appropriate value in the auto-suggest box.
This action will reassign the Distribution Account and Accounts Payable account for the transaction.
Finalize Transaction To finalize the processing of a transaction, the Vendor, Distribution Account, Accounts Payable, and Checking Account fields must be filled out before clicking the Add button.
When you click the Add button, the following actions will occur:
- A/P Voucher is created
- A/P Voucher is posted
- A/P Manual check is created paying the account
- Cash Reconciliation charge entry is created against the selected checking account
- All GL transactions for each of these steps are applied appropriately
If you find a duplicate transaction in your list, or other transaction you do not want to process through this utility, simply click the Delete button on the row for the transaction.
Completed Posting
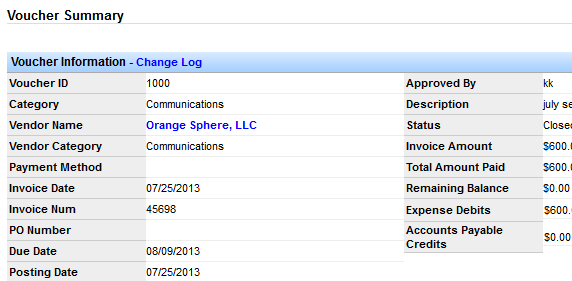
To view the voucher summary, follow the path in the menu Accounting > Accounts Payable > Vouchers > Search Vouchers.
A window will open and allow you to search for specific vouchers.
Click on the ID of the appropriate voucher.
A Voucher Summary window will open.