Set Up Owner Operators
Introduction Transport Pro is an all-inclusive transportation management software solution that provides all of the essential tools you need to successfully and efficiently manage and grow your business.
This guide walks you through the getting started process in a detailed, step-by-step manner.
Please note that Transport Pro also has a dedicated support staff available to answer any questions you have.
You can reach a Transport Pro team member at support@transportpro.net.
Please note that you must set up your owners, drivers and equipment first, and in that specific order.
Once you get your owners, drivers and equipment entered, you can set up the rest of the items in any order.
Of course, if you are going to have someone besides yourself enter all of the information, you need to set them up as a user in the system.
To do this, please see the “Set Up System Users” section in this document.
Set Up Owner Operators The very first step to using Transport Pro is to set up your owner operators.
Again, you must do this before moving on to any other steps.
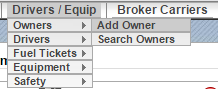
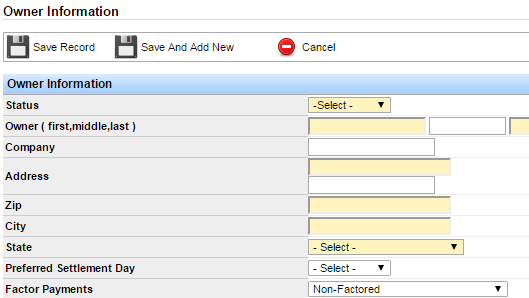
- Follow the path in the menu Drivers/Equip > Owners > Add Owner.
- An Owner Information window will open.
Fill out all of the applicable information.
Although only the yellow fields are required, Transport Pro recommends filling out all applicable information for organizational purposes.
- In many cases, the owner is also the driver.
When you are filling out the owner's information, you have the option to create a driver record for that owner.
To do this, check the “Create Driver Record Using This Information” box.
If you check this box, when you click “Save Record,” you will be re-directed to fill out more information for the driver.
Note: You must fill out the Billing/Payment Information section in order for the
system to transfer the information to settlements and pay the correct person.
If applicable, you can copy the information from above by clicking on the “Copy Information From Above” link.
Otherwise, be sure you enter the correct information here.
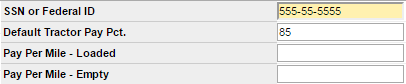
Either a SS# or Federal ID is required in this section.
You also need to enter the pay for the owner operator.
You can enter the default tractor pay percentage, or a pay per mile rate.
If you enter 0.00 in this section, the system will default to 75 percent on the dispatch.
An amount must be entered here in order for the rate to drop in automatically on the dispatch.
The rate entered here will also affect the driver's pay because you are required to attach all drivers to the correct owner, and the system is designed to pay the owner of the truck.
- Once everything looks correct, click “Save.”
Set Up Drivers After you have entered your owner operators, you need to set up your drivers, including any company drivers.
Note that if you have opted to create a driver record for an owner, you will be re-directed to the Driver Information screen.
- Follow the path in the menu Drivers/Equip > Drivers > Add Driver.
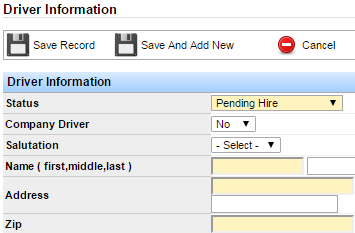
- A Driver Information window will open.
Although only the yellow fields are required,
Note: Be sure to check ALL applicable boxes in the “Trailer Qualifications” section.
If you do not check the correct boxes here, you will receive an error message upon dispatch that says the driver you are trying to dispatch is not qualified to move the trailer you are dispatching him/her with.
For example, if you only check “Flatbed” in this section, but go to dispatch the driver on a reefer, you will receive and error message.
You can open Transport Pro in a new tab so you don't lose your place, and then check the applicable boxes, and go back to the dispatch.
Assign Drivers to Owners
- Click “Save Record.”
Assign Drivers to Owners When you add an owner profile to Transport Pro, the system gives you the ability to also create a driver profile for that person.
However, this option is not always applicable.
Therefore, you still need to assign a driver, or drivers, to a particular owner.
This section explains how to add the correct drivers to an owner.
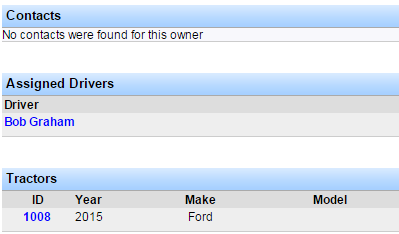
- Navigate to the preferred Owner Summary screen, and scroll down until you see the “Assigned Drivers” section.
- If you have created a driver record for the owner, you will see the owner's name in the “Assigned Drivers” section.
If you need to assign a driver, click on the “Add Driver” link in that section.
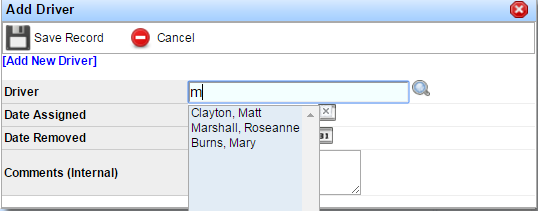
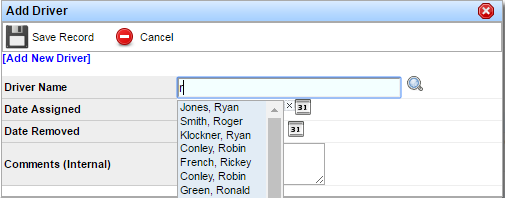
- An Add Driver window will open.
Since you have already added your drivers to the system, when you begin typing the driver's name in the Driver field, the name will populate for you.
Click on the name to lock it in.
Enter the date assigned and any internal comments if applicable.
Note: You can add as many drivers as you need.
There is no limit.
If you need to remove the assigned driver from this owner's profile, you can use the “Edit” icon to enter a “Date Removed” or you can use the scissor icon to delete the driver from this section.
- Click “Save Record.”
- Repeat this process for assigning all drivers to owners.

Set Up Equipment
Once you have set up your owners and drivers, you need to set up your equipment and attach it to the correct owner and driver.
Note: You must attach the correct equipment to the correct driver.
If you do not complete this step, the equipment will not auto-populate on the dispatch when you insert the driver.
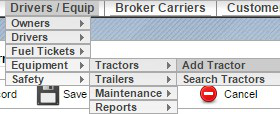
- Follow the path in the menu Drivers/Equip > Equipment > Tractors > Add Tractor.
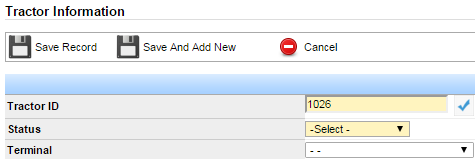
- A Tractor Information window will open.
Enter the correct information.
Although only the yellow fields are required, Transport Pro recommends filling out all applicable fields for organizational purposes.
- After entering all of the tractor information, click “Save Record.”
Note: You will notice that when filling out this form, the system asks you to assign an
owner to the tractor, so when you click “Save Record,” you will see the owner's name in the “Owner History” section.
However, you still need to assign the driver, or drivers, to this tractor.
- After you click “Save Record,” scroll down on the Tractor Summary screen to the “Assigned Drivers” section.
Click on the “+Add Driver” link.
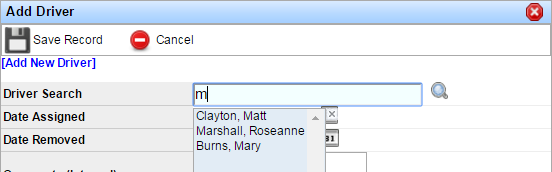
- An Add Driver window will open.
Since you have already added your drivers in the system, when you begin typing the driver's name in the Driver Search field, the name will auto-populate.
Click on the name to lock it in.
Enter the date assigned and any internal comments if applicable.
- Click “Save Record.” You will now see the driver's name in the Assigned Drivers section.
You can add as many drivers as necessary.
There is no limit.
Note: If you want to remove a driver from this section at any time, you can come back
in here and enter a “Date Removed.” You can also use the scissor icon to delete the driver from this section completely.
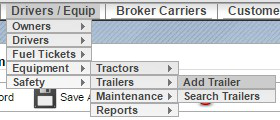
- To add a trailer, follow the path in the menu Drivers/Equip > Equipment > Trailers > Add
Trailer.
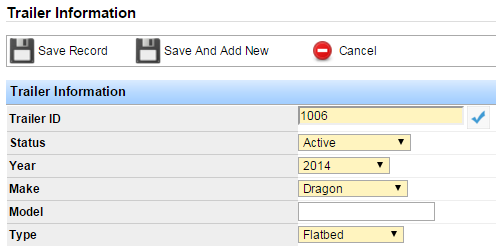
- A Trailer Information window will open and prompt you to enter the correct information.
Although only the yellow fields are required, Transport Pro recommends entering all of the applicable information for organizational purposes.
- After entering all of the information, click “Save Record.”
Note: You will notice that the form does ask you to assign an owner to the trailer.
However, you still need to assign a driver to the trailer as well.
This process is the same as assigning a driver to a tractor, as shown in the above steps.
- To assign a driver to the trailer, click on the “+Add Driver” link.
- An Add Driver window will open.
Enter the driver's name.
Since you have already entered your drivers in the system, when you begin typing the owner's name in the Owner field, the name will auto-populate.
Click on the name to lock it in.
Enter the date assigned, date removed or internal comments if applicable.
Click “Save Record.”
Set Up System Users
- Once you have assigned both the owner(s) AND driver(s) to the trailer, you are ready to move on.
Note: When you attach a driver to a tractor or trailer via the tractor or trailer summary
screen, the equipment assignment will populate on the driver summary, so that you don't have to enter it twice.
Or, you can attach the equipment to the correct driver via the driver summary screen, and the equipment assignment will show on the tractor/trailer summary screens.
To recap, at this point you should have completed the following steps:
- Enter all owner operators into the system.
- Enter all drivers into the system.
- Enter all equipment into the system.
- Assign drivers to owners.
- Assign drivers to equipment
Set Up System Users Before you can efficiently use the Transport Pro system, you must enter all of the users who need access to the system.
Administrators can arrange individual preferences for each user.
Transport Pro even has an option in place to duplicate settings for multiple users, which can save you a lot of time.
Below is a step-by-step guide on how to enter system users into
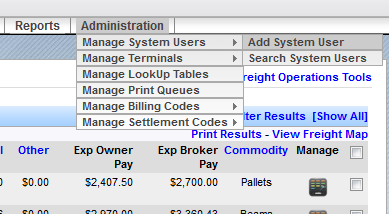
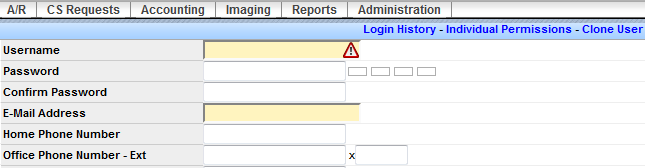
- Follow the path in the menu Administration > Manage System Users > Add System
Users.
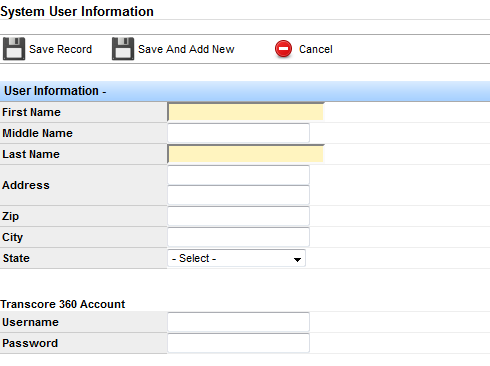
- A window will open and prompt you to enter the system user's information.
Although only the yellow fields are required, Transport Pro recommends entering all of the applicable information.
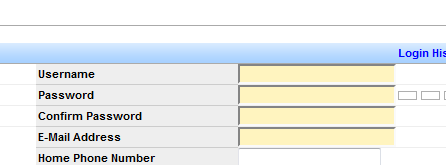
- Create a user name and password.
Transport Pro highly recommends using an email address for the user name because it is unique.
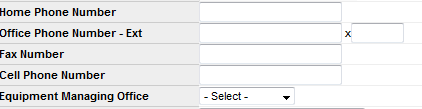
- Enter the office phone number.
When driver or broker/carrier confirmations are sent out from the system, the office phone number will show up on the confirmation.
If there is no phone number in this field, the system defaults to the number on the terminal.
If the terminal does not have a phone number, which is rare, the system will default to the phone number on file.
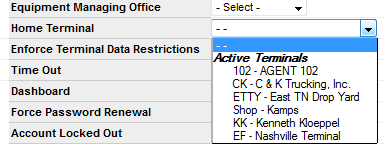
- Select the Home Terminal.
This is very important when you want to assign a user to a specific terminal.
- Decide if the user needs access to terminal data.
If the Enforce Terminal Data Restrictions option is off (not checked), the user can see all of the trucks, loads, customers, and reports for any terminal.
If the Enforce Terminal Data Restrictions is on (checked), the user is blocked from seeing trucks that are not assigned to their terminal and customers that are not theirs.
Reports will also be filtered based on their terminal's activity.
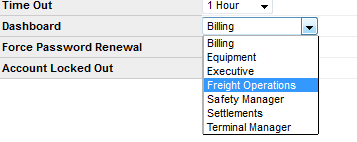
- Choose the appropriate dashboard.
Typically, you'll want to choose the Freight Operations option unless the user's job is centered around another department, such as Billing.
This will be the screen that the user is presented with upon log in.
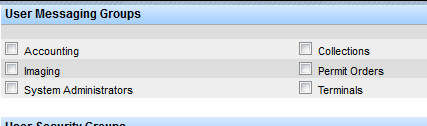
- Assign the user to the desired Messaging Groups by checking the appropriate boxes.
The system sends out automatic messages for dispatch or issues with accounting, for example.
This feature provides users with various messaging options.
When messages come through the system, they will appear under the Notifications icon at the top of the screen (see bottom figure).
- Select the User Security Groups by checking the appropriate boxes.
Be sure that the box labeled General is checked because this allows the user to log in.
If needed, more groups can be added upon request.
10.Select the correct Image Security Groups.
All of the different image types that are defined in the Manage Document Types section can be assigned to Image Security Groups.
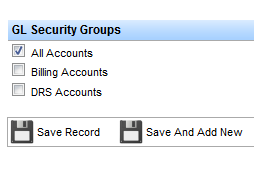
If the document types are assigned to Image Security Groups, the correct Image Security Groups boxes must be selected in order for the user to download them. 11.Determine if the user needs access to any GL Security Groups.
Typically, this section is used for those in billing, accounting or settlements.
Clicking certain boxes in this section gives the user access to information that has been assigned to the selected group.
Be sure to hit Save Record before exiting this page.
Important Notes
- The system automatically times out after one hour of being inactive.
If you would like to change this or add more options, contact a Transport Pro Administrator for assistance.
- If the user has a DAT, Internet Truck Stop or any other outside account, the user name and password will automatically show in the correct user name and password fields.
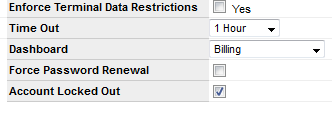
- After ten unsuccessful attempts to log in, the system automatically locks the user out.
When this happens, the Account Locked Out box becomes checked.
See below:
- The system cannot retrieve passwords, so when an administrator needs to reset a user's password, they must go in and uncheck the Account Locked Out box.
Next, the administrator must type in a new password in the Password and Confirm Password fields, and then check the Force Password Renewal box.
After an administrator does this, the user will have to reset their password in order to log in successfully.
- The Account Locked Out feature allows an administrator to prevent a user or former user from logging in.
For example, if an employee quits, the administrator can block that person from logging into the system by checking the Account Locked Out box.
- The Account Locked Out feature also affects licensing.
For example, if a company has ten licenses that are all maxed out and an employee quits, you can lock out that former employee by checking the Account Locked Out box.
You can then create a new user, who can utilize that tenth license.
- You can search system users by following the path in the menu
Administration > Manage System Users > Search System Users.
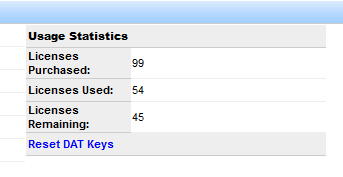
The page provides a list of all system users as well as how many licenses each user has purchased and used.
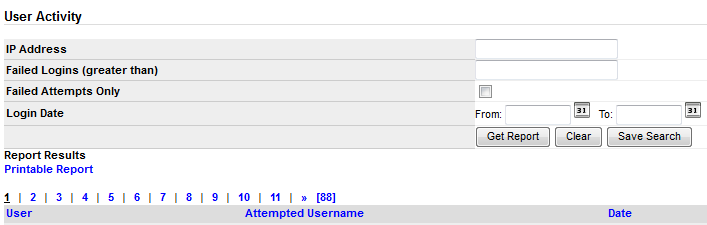
- You can view user activity by following the path in the menu Administration > Manage
System Users > User Activity.
This page allows you to filter and obtain reports on system users.
Type in the desired information and click the Get Report button.
A list of results will appear.
This feature is commonly used to view when individuals are logging in and whether access to the system has been granted or denied.
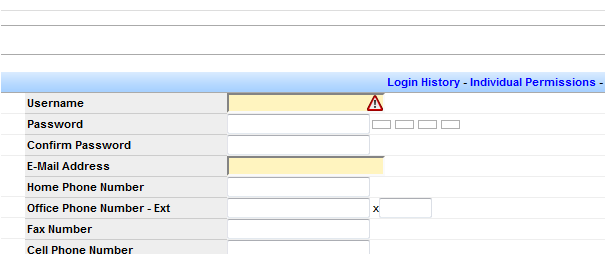
- You can also view user activity by following the path in the menu
Administration > Manage System Users > Search System Users.
After filtering the desired user information, click on the user ID and then, click on Login History in the upper right-hand corner of the screen.
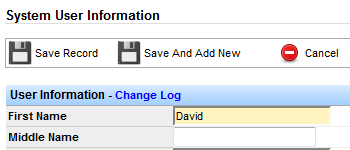
- You can view the user's change log by clicking on the Change Log link.
The change log shows every time an account has been changed.
For example if a user or administrator changes a password, it will show up in this log.
- If you need to set individual preferences for a user, contact a Transport Pro administrator for assistance.
For example, if you do not want a user to have access to a certain User Security Group, but would like the user to have access to a specific report, Transport Pro can accommodate this request.
- If you want to keep all of the settings the same for more than one user, you can carry over identical settings by clicking on the Clone User link.
This feature also carries over any individual permissions.

Set Up and Manage Look Up Tables
Lookup tables represent certain items that will auto-populate for you throughout the system in drop-down menus, but you need to enter them first in order for this to work correctly.
For example, when you add a new tractor to the system, the tractor type is required.
The tractor types that you enter in the lookup Tables will be available options for you to select when adding a new tractor as long as you enter the tractor types in the look up table.
You must enter at least tractor makes, trailer makes and trailer types in this section.
We recommend familiarizing yourself with each lookup table category to ensure that you do not miss anything.
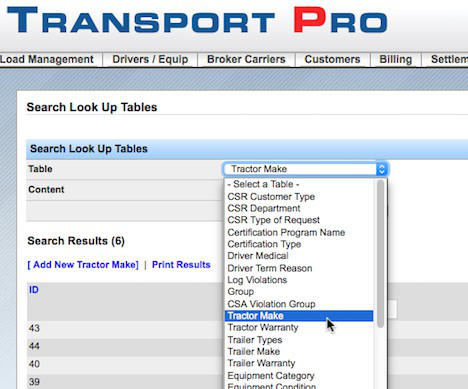
- Follow the path in the menu Administration > Manage Look Up Tables.
- A window will open that allows you to search for specific lookup tables.
Use the table drop-down menu to choose the appropriate option.
Then click “search.”
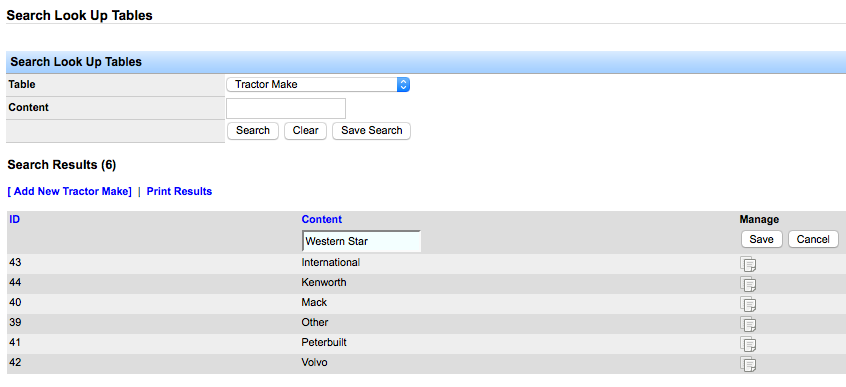
- Any items that have been entered under the selected category will populate.
The picture below shows what the window looks like when the Tractor Make category is selected.
If you need to add additional items, click the “add new” option located in the upper left-hand corner.
- If you choose to add an additional item, a box under the content column appears and allows you to make an additional entry.
Repeat this process to add as many items as necessary.
Be sure to click “save” after adding each item.
Set Up Terminals A terminal refers to an agent, office or groups of people that need to be set up to automatically receive commissions.
By setting up a terminal in the Transport Pro system, commissions can be automatically calculated based on the information you input.
This information is transferred to the settlements section to make billing a simpler process.
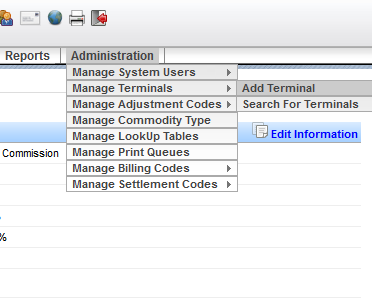
- Follow the path in the menu Administration > Manage Terminals > Add Terminal.
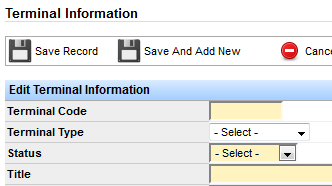
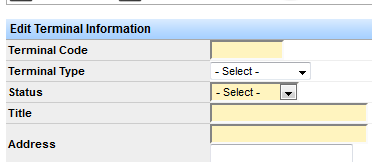
- Enter a terminal code in the Terminal Code Box.
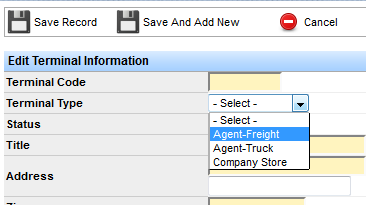
- Select the terminal type from the drop-down menu.
Although this step is not mandatory, it helps to keep the terminal information more organized.
The options in this drop-down menu are hard coded and not available in the Look Up Tables.
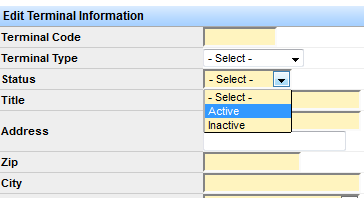
- Select the correct status from the Status drop-down menu.
This status only affects the terminal and the not user.
For example, the user can be active with an inactive terminal.
- Enter a title in the Title field.
This can be a company name or an individual's name based on your needs.
- Enter a valid address to match the company name or individual.
Remember, all of the fields in yellow are required.
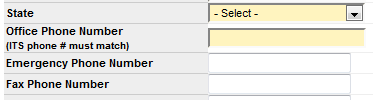
- Enter an office phone number.
The office phone number will show up on all of the rate and driver confirmations.
If a user already has a phone number on their account, this phone number serves as the backup number.
This phone number must also match what Internet Truck Stop has on file.
If you enter an emergency phone number, it will show up on the driver confirmation as the emergency contact.
If you enter a fax number, it will show up on the carrier confirmation.
- Select the date the terminal began business operations.
Then, select the date it closed, if applicable.
- Determine if you need to print a 1099 form.
You may need to print a 1099 form if the person you are filling this out for is an independent contractor.
You may also need to print the 1099 form if you need to produce a revenue code for an agent.
If you need to print this form, be sure that the Print 1099 box is checked.
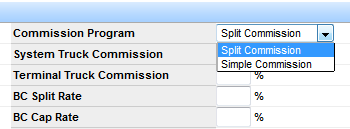
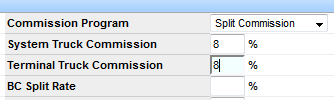
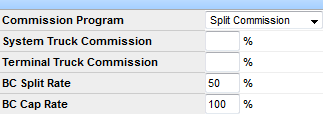
10.If you need to split up the freight portion of the bill, be sure the Split Commission option is selected in the Commission Program drop-down menu. 11.Enter the desired percentages into the System Truck Commission and Terminal Truck Commission fields.
These fields are geared toward asset-based companies.
For example, if you want to pay 8% commission of the freight for any asset-based dispatch, you would enter 8% in System Truck Commission and Terminal Truck Commission fields. 12.Enter the desired percentages into the BC Split Rate and BC Cap Rate fields.
When
- calculating a carrier percentage, the formula is: how much you billed versus how much you have to pay out.
For example, if you have a $1,000 load and you want to give the agent the ability to break even, you should enter 100 in the BC Cap Rate field.
If you make a $500 profit and you wish to split it with the agent, then you would type that percentage into the BC Split Rate field.
For example, if you want to give the agent 50% of the profit, you would enter 50 into the BC Split Rate field.
Note: You can put any cap on the agent.
For example, if you have a $1,000 load and you cap the agent at 85%, the agent can pay up to 85% ($850) of the load before penalty kicks in.
If the agent decides to pay 90% ($900) of the load to the carrier, then the system would automatically charge the agent 5% of the $1,000 and that 5% deduction would show up on the settlement.
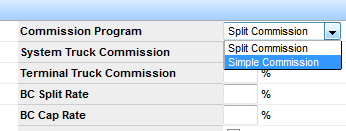
- If you are a broker and need to enter split percentage information, choose the Simple
Commission selection from the Commission Program drop-down menu.
The Simple Commission option is only for brokers.
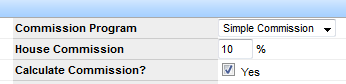
- If you are a broker using the Simple Commission option, you need to enter the desired percentage in the House Commission field.
The House Commission percentage is the amount that the broker will receive regardless of cost.
For example, if the broker enters 10% into the House Commission field for a $1,000 load, then the broker will make $100 no matter what.
- Decide if you want the system to calculate the commissions.
In order for the system to calculate the commissions, the Calculate Commission box must be checked.
- Decide if the User Owner Operator Contractual Rate is applicable, and if so check the box.
This option would be used in the case that an agent pays the driver a higher percentage than what the contract defines.
For example, if an owner operator has a contractual agreement with a company at 75%, but the agent dispatches the owner operator at 78%, this percentage is taken into account when calculating the agent's standard 8% commission.
If the Calculate Commission box is checked, the system will calculate the agent's commission with the standard 75% contractual rate.
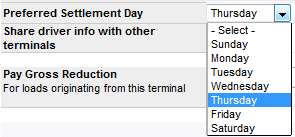
- Determine the preferred settlement day and select the day from the Preferred
Settlement Day drop-down menu.
When you need to calculate commissions for an agent, you can decide which day these commissions will appear in the Settlements section.
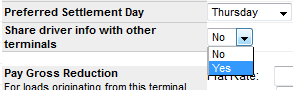
- Determine if you need to share driver information with other terminals and choose the preferred option from the drop-down menu.
If you have drivers that are assigned to a specific terminal, you can decide whether or not to share the driver's contact information with other terminal users in the system.
If you opt not to share the driver's information, system users will be forced to call the terminal phone number.
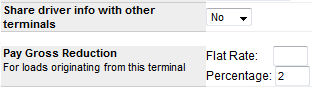
- If applicable, enter the Pay Gross Reduction information.
This field would be used in the case that a company wants to take a percentage off the top before calculating commissions, or if a company has to pay more than the standard rate for insurance.
The system subtracts the Pay Gross Reduction amount before calculating commissions.
For example, if you have a $1,000 load and you want to take 2% off the top, then the system would use $980 as its base number when calculating the commissions.
You can only enter either a percentage or a flat rate for these items, not both.
Note: Company drivers are paid per mile or by a certain percentage, so Pay Gross
Reductions do not affect their pay.
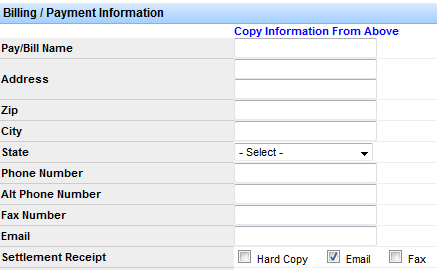
- Fill out the Billing/Payment Information section.
If you want to calculate commissions for a terminal and ensure that the commissions are paid out, you must complete this section.
If applicable, you can copy the above section's information by clicking on the Copy Information From Above link.
You can also determine how a terminal manager receives their settlement by clicking on the Hard Copy, Email or Fax box.
Transport Pro supports environmentally-friendly practices and encourages using email for settlement receipts.
- Enter the appropriate SSN or Federal ID in the SSN or Federal ID field.
When a 1099 is processed, it is summarized by a SSN or Federal ID.
This information is required.
- Be sure to click Save Record before exiting this page.
Add Broker Carriers Transport Pro allows brokers to enter carriers with ease.
If you have a large list of carriers, Transport Pro can work with you to upload this information into the system.
By saving this information in the system, the carrier will automatically populate when the carriers are dispatched on loads.
Once this information is entered and saved, you will not need to manually enter any of this information again.
- Follow the path in the menu Broker Carriers > Add Broker Carrier.
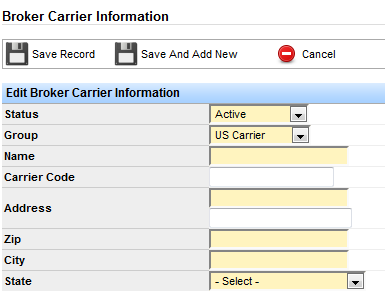
- A window will appear that prompts you to fill out the broker carrier information.
The fields in yellow are required.
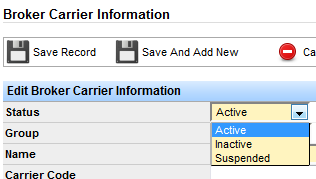
- Choose the correct carrier status from the Status drop-down menu.
The carrier must be marked as Active in order to be dispatched on a load.
If the carrier is marked as Inactive or Suspended, then the carrier cannot be dispatched on a load.
Note: If you are integrated with DAT and suspend a user, then the system marks that
user as Suspended, which takes the user away from dispatch.
However, if the carrier later passes qualification, the system will automatically mark the carrier as having an Active status.
If a carrier is marked as Inactive and later passes qualifications, the system will not move their status to Active.
You must change it in TP.
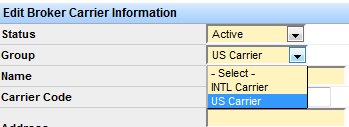
- Choose the correct Group.
This simply allows brokers to mark whether the carrier is domestic or international.
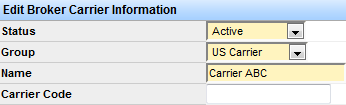
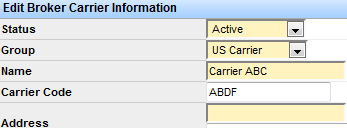
- Enter the carrier's name in the Name field.
- Enter the carrier code in the the Carrier Code field, if applicable.
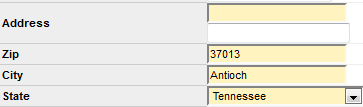
- Enter the carrier's full address.
Note: If you type in the zip code first, the city and state will automatically populate.
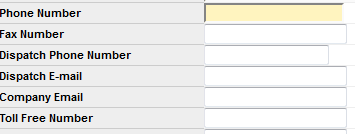
- Enter the carrier's phone numbers and email address.
The phone number is required.
Note: If the Dispatch Phone Number and Dispatch Email fields are filled out, then
when you dispatch the carrier, the system will automatically pull this information and place it on the dispatch board.
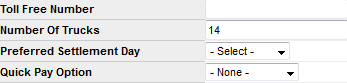
- Enter the number of trucks, if applicable.
Although this field is not required, it helps to keep the carrier information more organized.
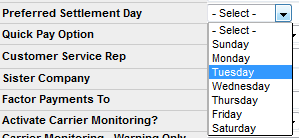
- Choose a preferred settlement day from the Preferred Settlement Day drop-down menu if desired.
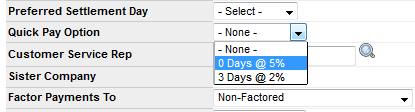
- Determine if you need to select a quick pay option from the Quick Pay drop-down menu.
For example, if you agree to pay a carrier $1,000 within the standard 21-30 days, but the carrier wants to receive payment sooner, you can choose the quick pay option that fits the carrier's needs.
The options show what percentage will be deducted from the carrier's pay, based on how soon they receive payment.
As shown in the example below, if a carrier receives payment immediately, then 5% will be deducted from the total amount the carrier receives.
Note: You can customize the quick pay options by following the path in the menu
Administration > Manage Carrier Quick Pay and entering the correct information.
- Determine if you need to factor payments to a third party by choosing the appropriate option from the Factor Payments To drop-down menu.
When you choose to factor payments to a third party, the system overrides where the payment goes.
According to the picture below, the check would be made out to WEX Fleet one Factoring instead of to the carrier directly.
Note: Although the system does create a primary settlement for the carrier, when a
third party is selected from the Factor Payments To menu, the system also creates a secondary settlement.
Therefore, the system makes the check out to the third party (In this example WEX Fleet one Factoring) instead of to the carrier directly.
These factor payment options can be set up by following the path Settlements > Factoring Companies > Add Factoring Company and entering the correct information.
Once the companies are entered and saved in the system, you will not need to re-enter the information.
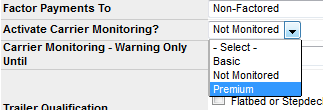
- Determine if the carrier needs to be monitored by choosing the preferred option from the Activate Carrier Monitoring drop-down menu.
The basic option allows you to monitor the carrier's CSA information, which comes from the Federal Motor Carrier Safety Administration (FMCSA).
The basic option also allows you to view carrier scores and set thresholds.
The premium option allows you the same privileges as the basic option plus access to the carrier's insurance information.
Most carrier's have certificates of insurance on file, which you can view.
If the Premium option is selected from the Activate Carrier Monitoring menu, the system will automatically download updated certificates of insurance every night and put them on file.
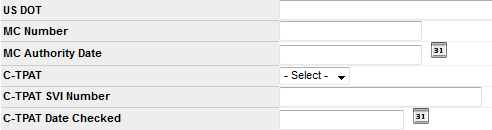
- Enter the US DOT information.
A C-TPAT is a form of certification given to carriers, brokers or shippers from the Department of Homeland Security.
If these details are applicable, enter them into the appropriate fields for informational purposes.
- Enter the carrier's auto liability insurance information.
The carrier must have auto liability insurance.
The Auto Liability Insurance Carrier and Renewal Date fields are required.
Note: If the Premium option from the Activate Carrier Monitoring menu is selected,
the system will automatically update the Auto Liability Insurance information if the information on the certificate of insurance is different than the information in these fields.
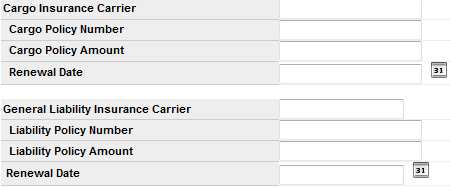
- Enter the Cargo Insurance and the General Liability information, if applicable.
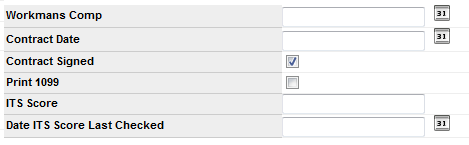
- Enter the Workman s Comp information, if applicable.
Note: If the contract date is entered into the Contract Date field, but the Contract
Signed box is not checked, it will block the settlements department from being able to settle this carrier.
If the contract date entered into the Contract Date field is expired, the settlements department will not be able to settle this carrier.
The ITS Score is the rating given to a carrier by a third party, such as DAT.
This is not a mandatory score, and therefore, may not be applicable.
The company that gives this rating depends on which company the broker uses.
This score does not affect dispatching.
System users can search for broker carriers by this score.
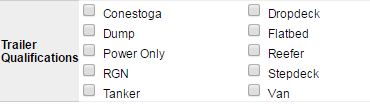
- Mark the appropriate Trailer Qualifications boxes, if applicable.
For example, if a company only has flatbed trucks, you can check the Flatbed box.
You can also use these options to block users from assigning certain loads to certain trucks.
For example, if a user tries to assign a a reefer load to a carrier that only has flatbed trucks (according to the checked box), the system will prevent the user from assigning that load to the carrier.
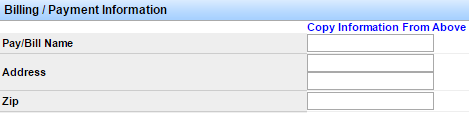
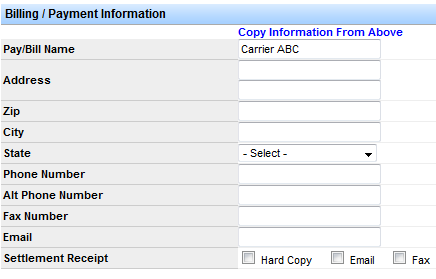
- Enter the Billing/Payment Information.
You must fill out this section in order for the correct person to get paid.
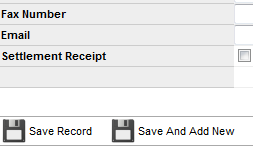
The Settlement Receipt boxes determine how the carrier receives a settlement receipt.
Transport Pro encourages selecting the Email option for Eco-friendly purposes.
If the billing information is the same as the information above, you can click on the Copy Information From Above link.
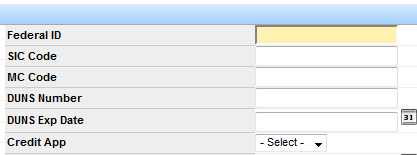
Be sure to enter the correct information in the Federal ID field.
Note: The billing information will not be transferred to settlements if the bottom half
of the form (Billing/Payment Information) is not filled out.
- Click Save Record before exiting the window.

Search for Broker Carriers
search by specific criteria if desired, or you can bring up a list of all broker carriers.
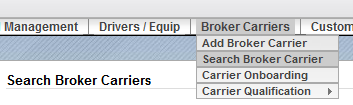
- Follow the path in the menu Broker Carriers > Search Broker Carrier.
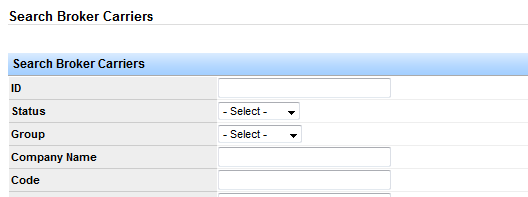
- A window will appear that allows you to search for specific carriers based on the criteria you filter.
After you filter the desired information, click Search.
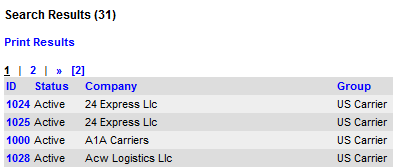
- A list of carriers will populate.
To view the detailed information of a carrier, click on the desired ID number.
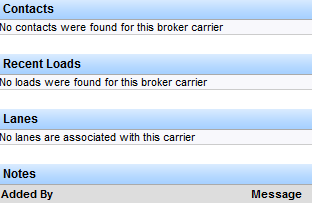
- A summary opens, providing detailed information, such as the information that was entered when the carrier was added as well as contacts, recent loads and important notes.
Note:
- If you need to add a contact for a carrier, click on the Add Contact link on the Broker
Carrier Summary page.
When the window opens, enter the information and click Save Record.
Repeat this process when adding other information by clicking on the appropriate link.
Set Up Chart of Accounts Transport Pro's Chart of Accounts section is designed to keep revenue, liability, expense, asset, and equity accounts organized.
Transport Pro offers a default Chart of Accounts to make adding and organizing accounts simple.
If you prefer to use your own Chart of Accounts, a Transport Pro administrator will help you organize your accounts and enter them into the system as part of the set up process.
Note that our system also integrates with Quick Books, so you can use Quick Books instead of our Chart of Accounts if preferred.
Our Chart of Accounts module is very robust, so we highly recommend that the chart of accounts be managed by a professional CPA.
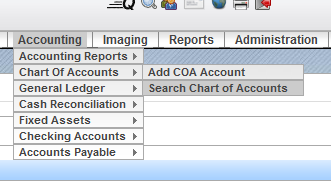
- Follow the path in the menu Accounting > Chart of Accounts > Search Chart of Accounts.
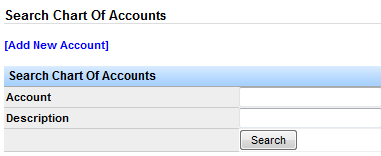
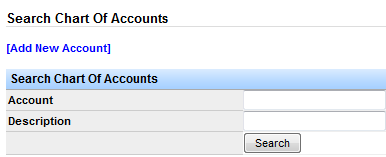
- A window opens that allows you to search for a chart of accounts.
Click Search.
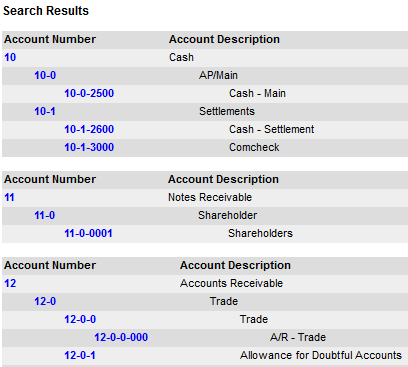
- When you click Search, a list of all the entered/default accounts appear.
These accounts include the transactions that occurred from load sales and settlements, and are the accounts that appear on the general ledger.
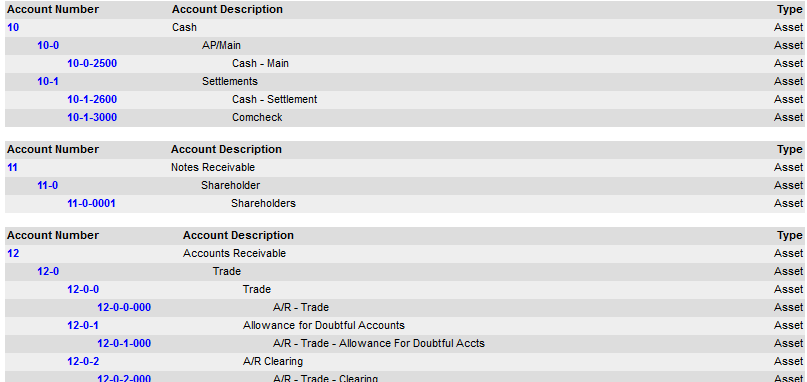
- By default, Transport Pro breaks up the chart because the system requires account numbers.
Transport Pro uses a chronological nesting system to categorize the types of accounts.
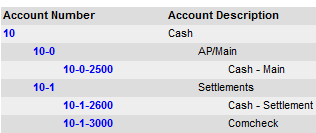
For example, if your Cash account number is 10, other items that fall under the Cash account umbrella can be sub-categorized within the nesting number system.
- Transport Pro also organizes the Chart of Accounts by chronologically grouping the types of accounts.
For example, groups 10 through 19 could be all of your asset accounts.
Groups 20 through 29 could be all of your liability accounts, etc.
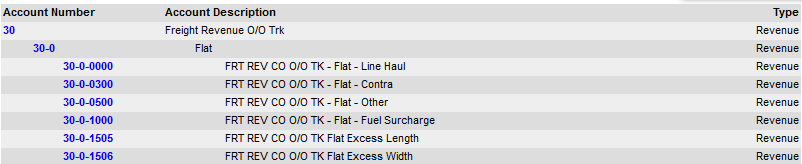
- By default, Transport Pro sets up the 30 series accounts to represent Freight Revenue.
For example, every time a load is billed from the front end, these transactions are entered into the 30 series accounts section.
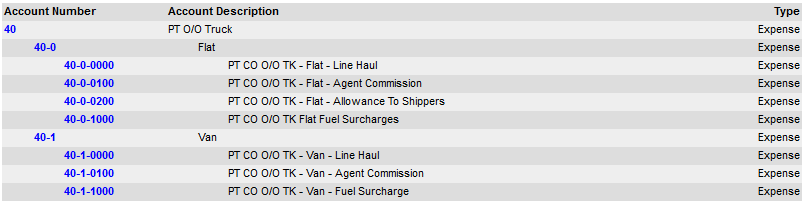
- Also by default, Transport Pro designates the 40 series accounts for Expense accounts related to loads.
Therefore, the system transfers any expense transactions related to loads to the general ledger.
Note: With this designated set up, you have the ability to easily compare the items in
the 30 series accounts against the items in the 40 series accounts, which shows you your load profits versus losses.
- Transport Pro automatically generates load sales transactions based on the type of carrier that is dispatched on the load.
For example, the 30 series accounts represent Freight Revenue accounts for Owner Operators, so if an Owner Operator is dispatched, the transaction will automatically generate in the 30 series group.
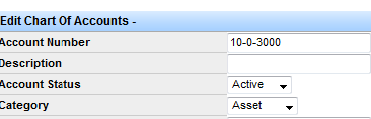
- If you need to add a new account, click on the Add New Account link in the upper left- hand corner of the page. 10.Enter a new account number.
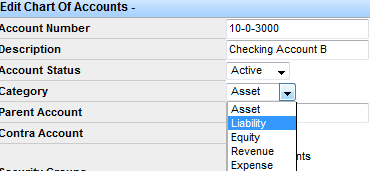
In the case that you want to enter a new Cash account, you would enter an account number that begins with 10, such as 10-0-3000. This is a required field.
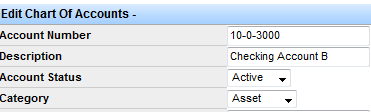
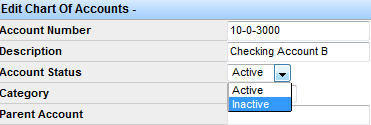
11.Enter the title of the account in the Description field. 12.Determine whether the account needs to be active or inactive and then choose the appropriate option from the Account Status drop-down menu.
The system does not allow you to delete accounts, but if you mark an account as inactive, it will block anyone in the system from accessing or editing the account. 13.Select the correct account category from the Category drop-down menu.
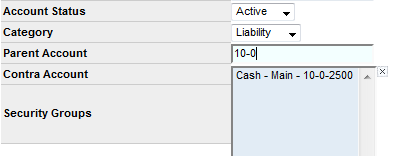
14.Enter the correct parent account number in the Parent Account field.
For example, the parent account number for the account 10-0-3000 is 10-
- As you type in this number, other account numbers under this parent account number will appear in the drop-down menu.
If you do not enter a Parent Account number, the system will create a new top- level account.
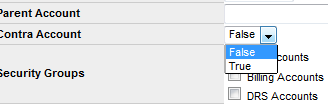
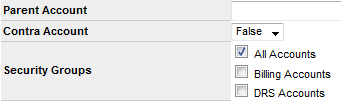
The account number will nest under the parent account number. 15.Choose the correct option from the Contra Account drop-down menu.
Accountants should know which option accommodates the account. 16.Select the security groups you want the account to go to by checking the appropriate box.
If you do not select a security group, the account information will not show up on any reports. 17.Be sure to click on Save Record before exiting the window.
Set Up Checking Accounts
checking accounts in an organized manner.
By default, the system provides a generic checking account setup.
Edit a Checking Account
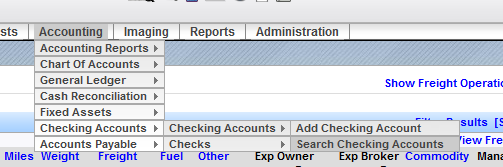
- Follow the path in the menu Accounting > Checking Accounts > Search Checking
Accounts.
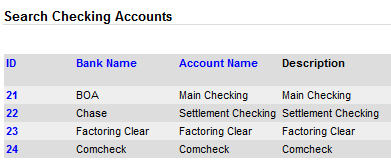
- A window will open that displays a list of all registered checking accounts.
To edit a specific account, click on the ID number.
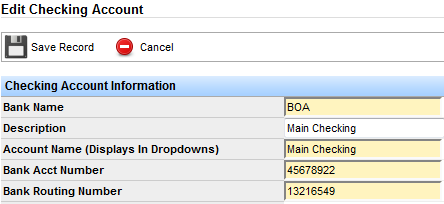
- Another window opens that presents a checking account summary.
To edit the checking account information, click on the Edit Information link in the upper right-hand corner of the page.

Add a Checking Account
- After clicking on the Edit Information link, the Checking Account Information section becomes editable.
The fields in yellow are required.
Add a Checking Account
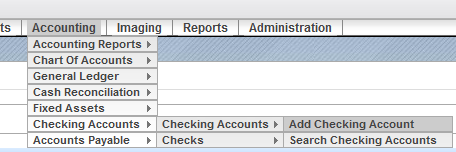
- Follow the path in the menu Accounting > Checking Accounts > Checking Accounts > Add
Checking Account.
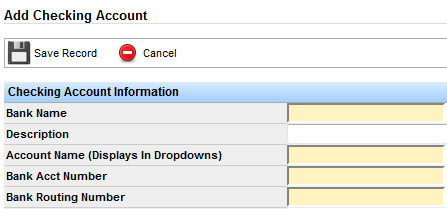
- A window will open that prompts you enter new checking account information.
The fields in yellow are required.
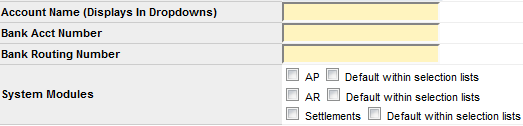
Note: Neither the Bank Account Number nor the Bank Routing Number is printed on
any checks.
These numbers do not determine how money is allocated for ACHs.
Entering the last four digits of these numbers is acceptable.
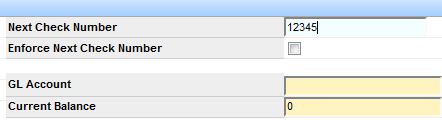
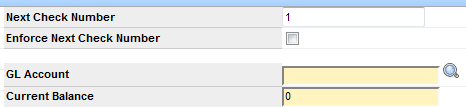
- Set the next check number by entering the correct check number in the Next Check
Number field.
Although this field is not mandatory, it helps to keep checks organized going forward.
When you enter a next check number, the system can automatically generate the next check with the correct number.
- Determine if the Enforce Next Check Number box needs to be checked.
By default, this box is not checked.
Checking this box prevents you from using a check number in the future.
- Enter the GL account number in the GL Account field.
The GL account is tied to the Chart of Accounts.
You are responsible for attaching this GL account to the Chart of accounts that you should have previously created.
These items must be set up in order for the system to work properly.
- Choose the correct system modules by checking the appropriate System Modules box.
The Accounts Payable (AP) module allows the system to write checks.
The Accounts Receivable (AR) module allows the system to receive cash into the account.
The settlements module allows the system to pay drivers and carriers.
The option to select any of these modules is available for the purpose of selecting the account for payment or cash receipts.
You also have the option to select any of these modules as the default.